How to Erase system partition windows 10
Windows 10 has released almost one year, Microsoft Claims that owners of this new Windows are rapidly increasing, but not everyone will buy what he says, after a month trial, many users began to find ways on how to erase system partition of Windows 10, many of which still can't get use to the metro style, the flat style inherited from Windows 8, so here is the solution for your search, of course, if you are looking for how to erase Windows Vista before install Windows 10, you are already here.
Steps of erasing system partition
1. Run Data Wiper, if you don't have it, download one to try;
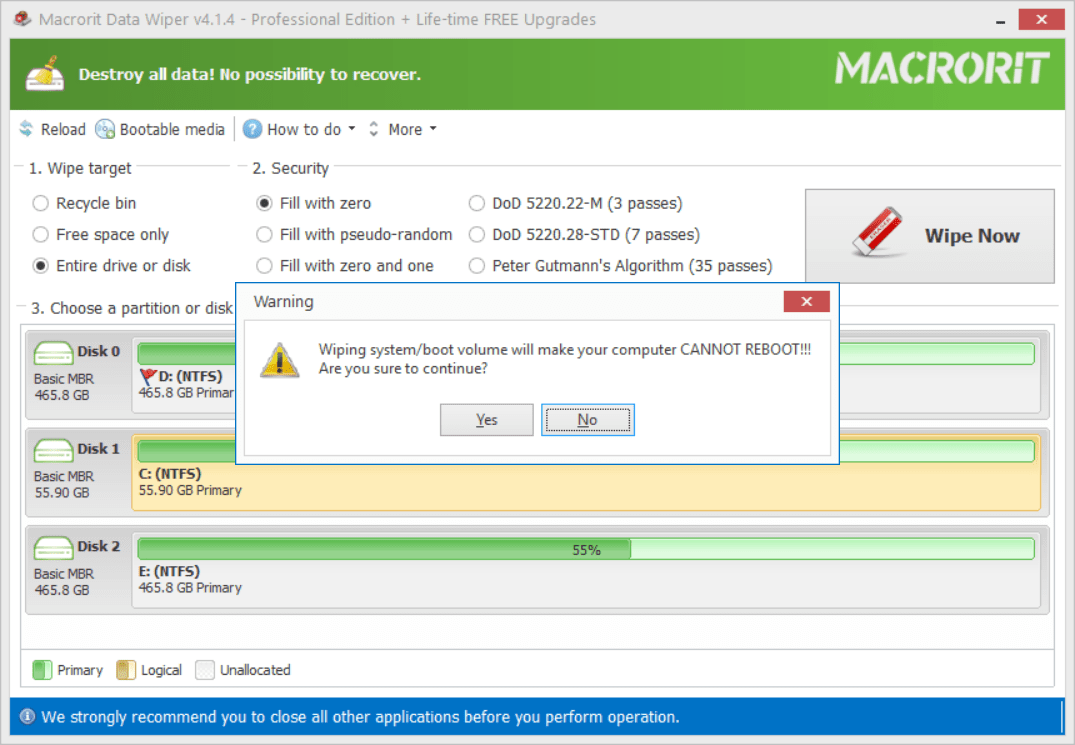
2. Then click on the boot partition, always Drive C as the system partition, then the "Wipe Now" bottom to go on, at the meantime, a warning message pop-up to make sure if you confirm, "Yes" to type "Wipe", the wiper does the rest, then there's no Windows 10 in your disk any longer.
Suggestion: if you want to reinstall new system with portable USB or any facilities alike in a clean disk, "Wipe Disk" is a good choice in Disk Partition Expert tool, when you meet the same alert, click "Yes" to confirm wiping whole disk within system and data partition.
The other way is to use the default setting, back to previous system, in control panel, if the previous one is data clean and runs really faster than the new one.
How to erase Windows Vista
Users of Windows Vista are not that much now, especially when Windows 7 and Windows 10 released, some of the users may erase Windows Vista and directly install Windows 10, the newest version of Windows 10 is 1803. Fortunately, Data Wiper supports Vista System; you can run it or download Disk Partition Expert to Wipe Disk if the data in those partitions are less important.
Remove Vista after upgrade Windows 7
The question put out by Shaon actually doesn't complicate, if you have Windows Vista in partition D, Windows 7 in Drive C, you can just use Data Wiper to "Wipe Volume" on the Vista Partition, then dooing a "Format Volume" operation to redistribute the space. What Shaon had done was common when Windows 7 first released, many people still have multiple boot systems in different volumes, if you would be a fan of a certain Windows System, and other volumes within systems might be wiped like this.
Update: Data Wiper 4.0 is now able to wipe recycle bin, so the complete functions of this data sanitization software are:
- Wipe free space
- Wipe Operating system
- Wipe hard drive
- Wipe entire drive (drive letter, file system, partition table and everything)
What will the wiped partition turn to
The wiped partition will become Unformatted, after Format this volume can used again, if you Delete Volume on this, the area will become unallocated space, which can be used for creating new simple volume or added to other partition to enlarge its size if that partition is about to run out of space, or we can create a new partition first and merge it to any partition which is showing low disk space alert warning
How to create partition on unallocated space?
Well, there are about two methods to create a new simple volume in Windows 10
1. Disk Management
You can use the following operations to create a new volume in the default partition managing tool:
- Right-click on the start button and choose Disk Management
- In the disk map, right-click on the unallocated space and choose New Simple Volume Wizard
- Follow the guide of the new simple volume wizard to create a new partition
2. Partition Expert
Partition Expert is another disk manager we developed, which can be the replacement of the default Disk Management tool, with more powerful functions, it does many jobs that Disk Management can’t, check the features to learn more if you want, and here comes the steps of creating new volume:

- Download Partition Expert, install and run; or just run the portable edition directly
- Click on the unallocated space and choose Create Volume
- Define details or just click OK to use the recommended setting and Commit
See also: how to wipe hard disk partition