Windows 10 Disk Management can't resize SSD partition [Fixed]
Table of contents:
I wanna resize my SSD partition on Windows 10, but the built-in Disk Management tool won’t allow me to do so, the Extend Volume option is grayed out, Do I have alternative programs?
Actually, the Windows disk utilities (Disk Management and diskpart cmd prompt) require continuous unallocated space to the target partition with NTFS file system, you can check if the drive you’re about to extend is NTFS or not, does it have unallocated space followed?
We can delete partition next to the drive to make space unallocated again, but there’s no need to perform such operation, since we have better alternatives
- A: Macrorit Partition Expert
- B: Macrorit Partition Extender
Both of them are portable programs, the portable package is around 11M, packed with both 32bit and 64bit edition
Learn more about Partition Extender
1. Use Partition Expert to resize SSD partition
Run the program and click Yes when the UAC(User Account Control) dialog shows, we’ll follow steps below to resize a partition (C Drive, for example):
Step 1: Create unallocated space
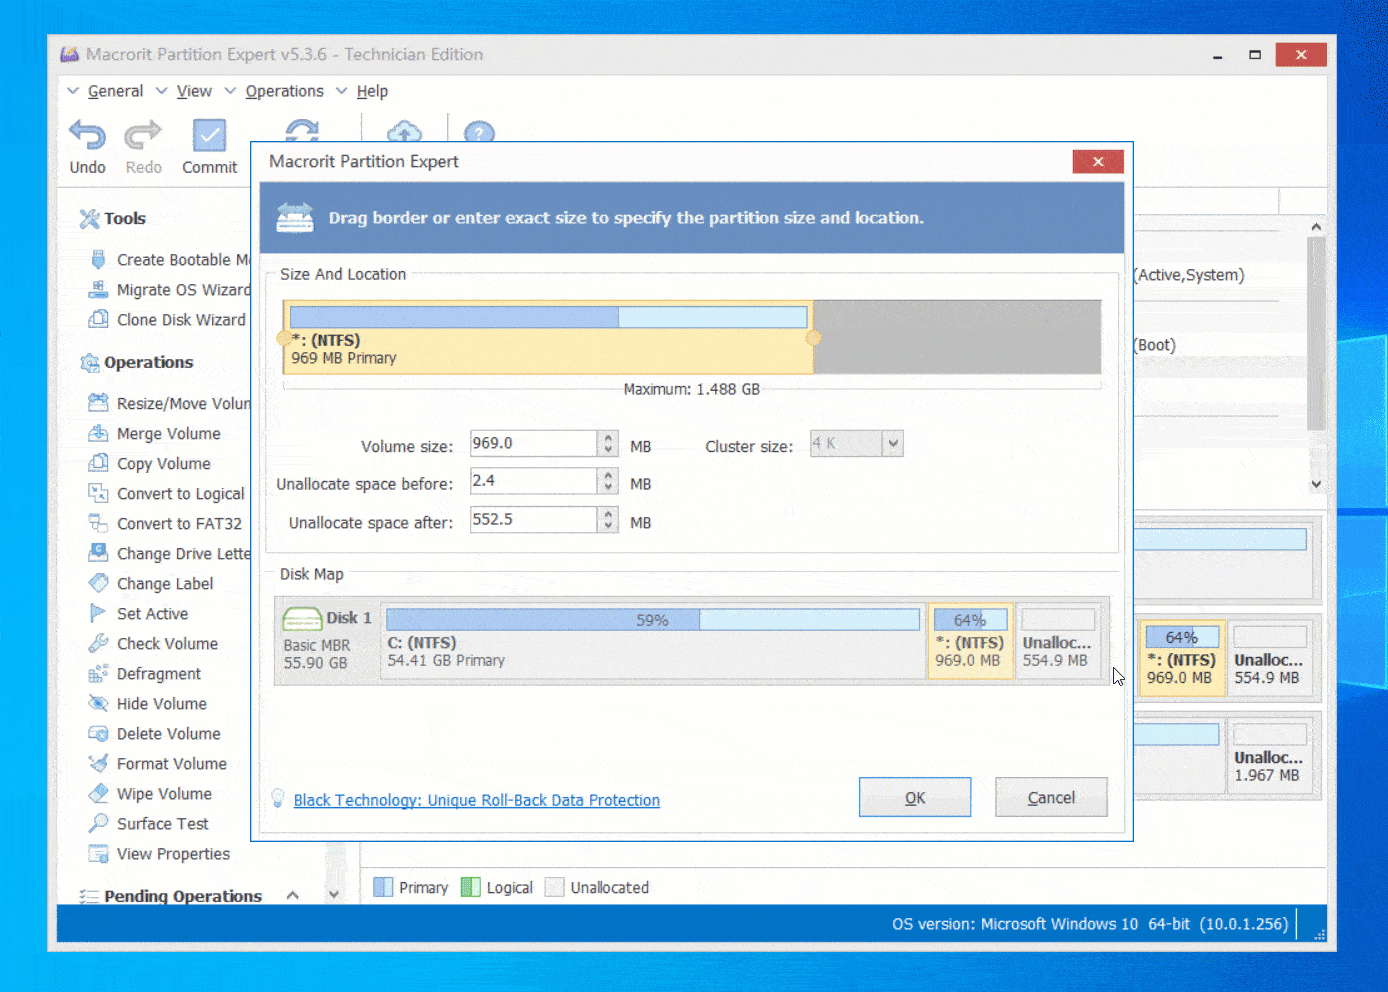
1. Click on a large partition, or a partition with much free space, in this screenshot it’s E Drive, it’s next to C Drive, but feel free to use any partition, even a partition far from C Drive, we can move it without data loss. Then click the function Resize/Move Volume
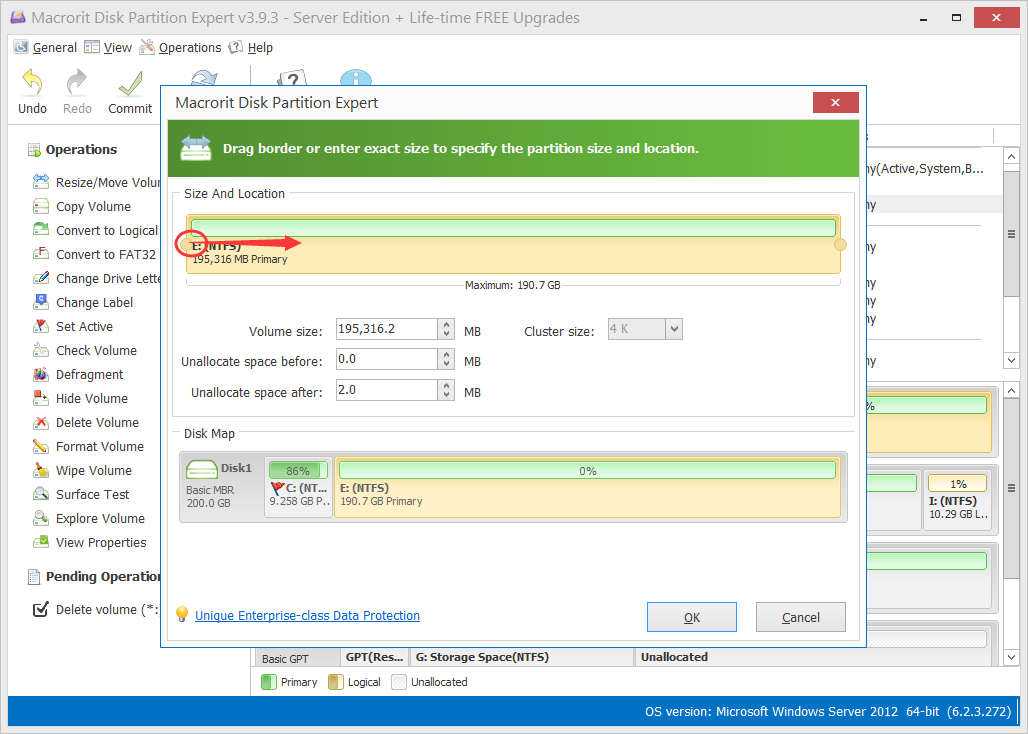
2. Click the handle bar on the left size to shrink this volume, click OK and this operation will be pended
Step 2: Move unallocated space
Tip: If the unallocated space is already next to C Drive, you can skip this step
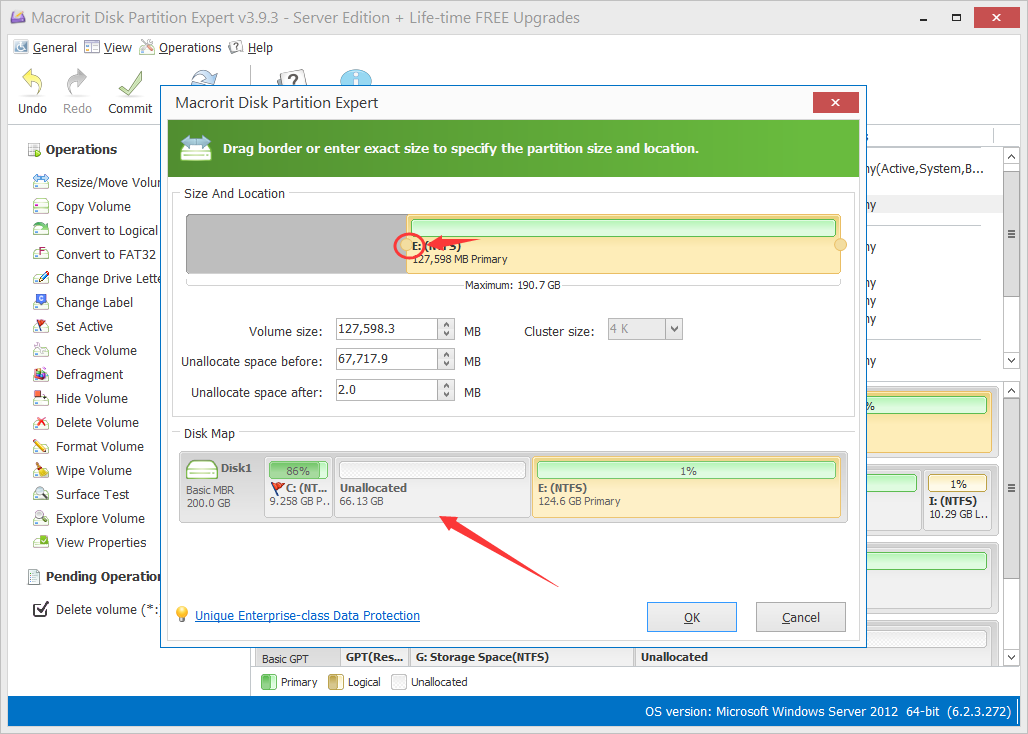
Click on the partition that is in between C Drive and the drive you shrunk, then click the Resize Move function and in the resize window drag the entire partition bar to the right, you’ll see unallocated space is moved ahead, click OK to pend this step
Step 3: Extend C Drive
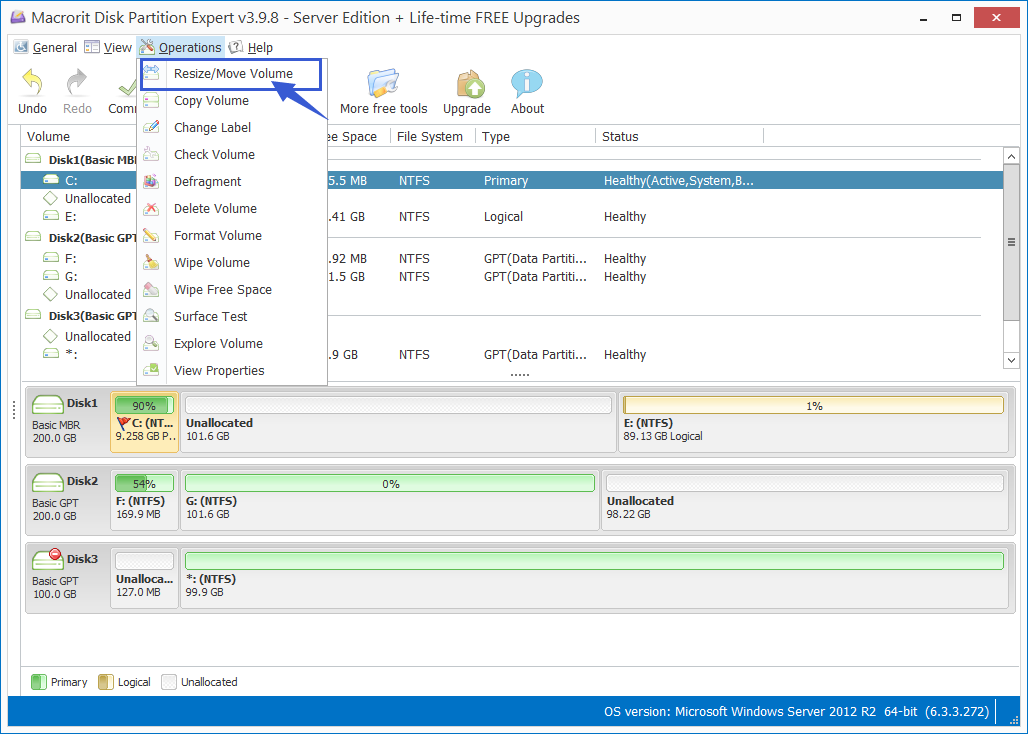
1. Now we click C Drive and click the function Resize/Move Volume again
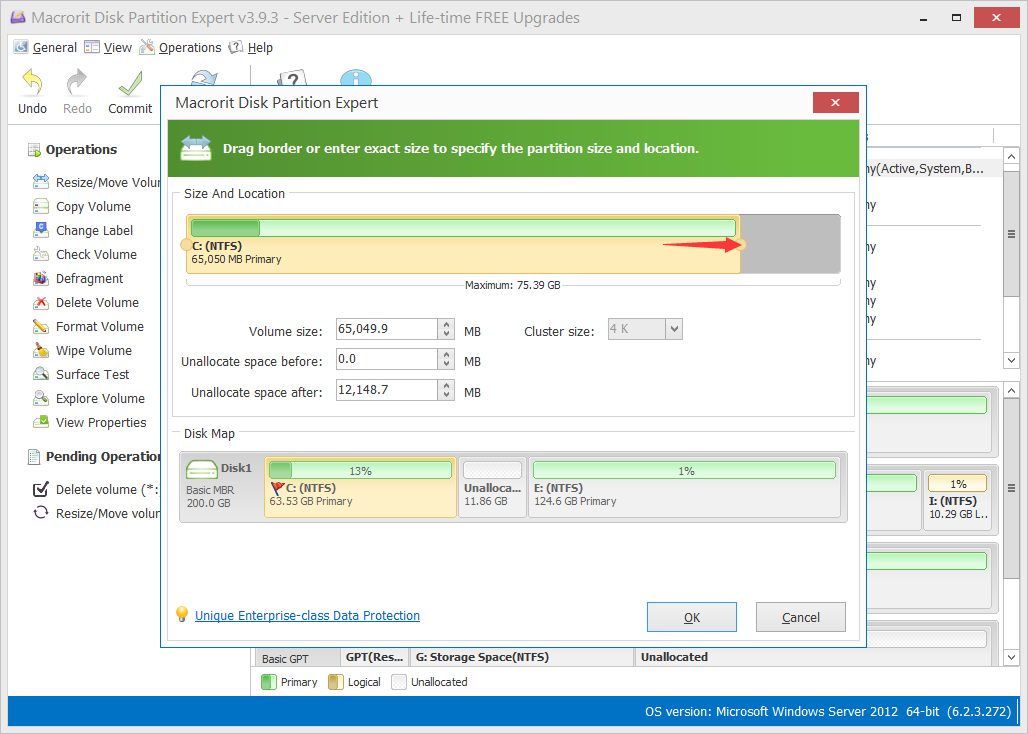
2. Drag the handle bar on the right side to the end, you’ll see unallocated space we just created is now taken by C Drive, click OK to pend this operation too
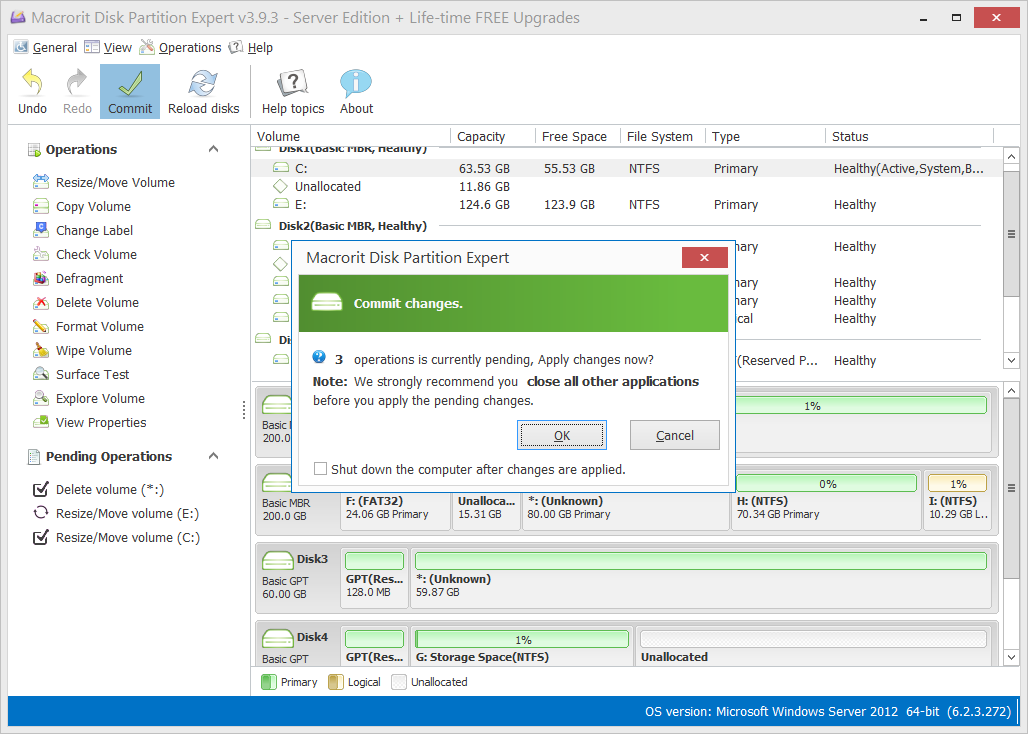
3. Now in the main window we click the Commit button to apply all the pending operations (shrink E and Extend C)
Learn more about Partition Expert
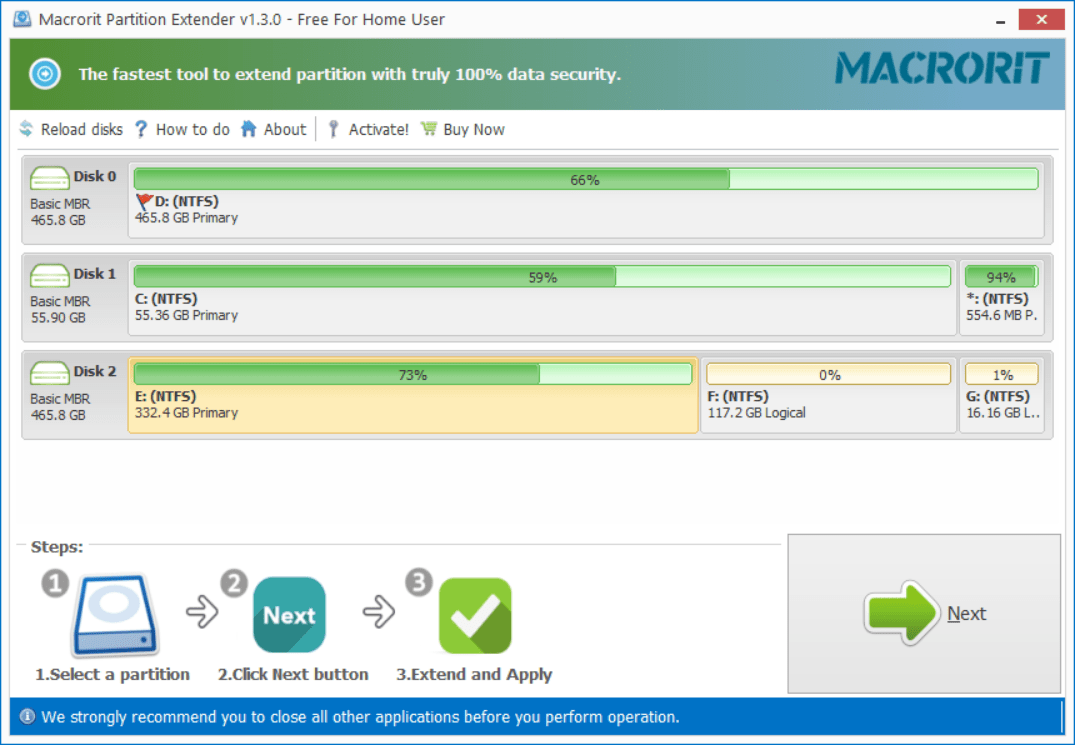
2. Use Partition Extender (directly extend)
In Partition Expert we have to create unallocated space from a large partition first if there’s no such space on the disk, but we can directly extend a volume in Partition Extender without shrinking a volume initially, try steps below:
Step 1: Click on the target partition
Click on the target drive directly (we’ll extend E Drive in this example) and click the giant button NEXT
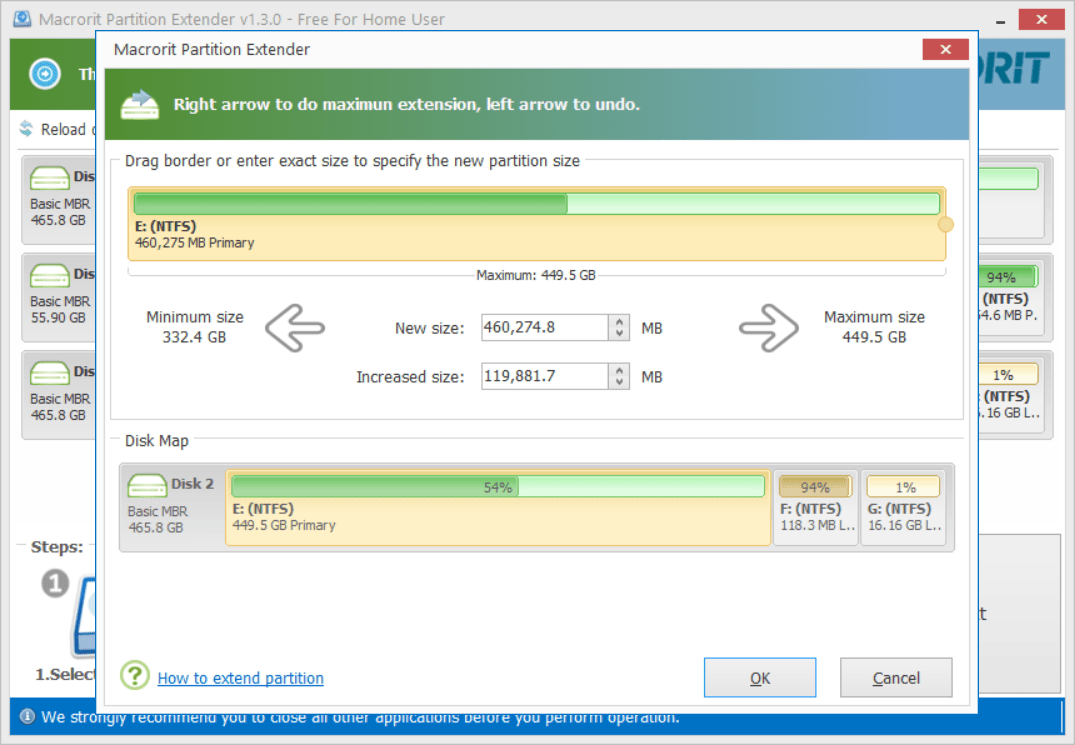
Step 2: Drag to extend this volume
In the resize window drag the handle at the right side to extend this volume directly, you may do it slowly to preview the effect and check out how much free space you’ve taken from the neighbor partition, then click OK
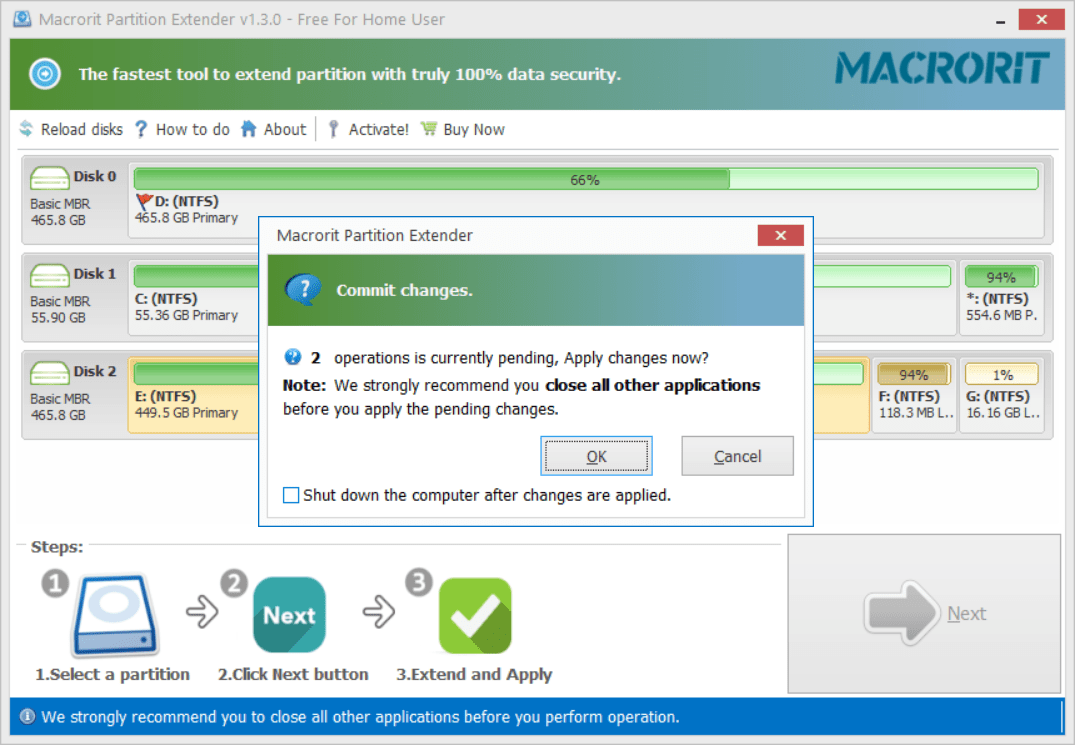
Step 3: Commit changes
Click OK again to commit this operation, yes, it’s 1 operation
The above two methods can be used to extend HDD, SSD, external hard drive, SD card, USB partitions, works on Windows 11, 10, 8, 7, Vista and XP
Other Utilities