How to Shrink Volume on Windows Server 2019 (4 methods)
Have distributed too much free space on a partition? Want to shrink D Drive to expand C? or just want to create new partition by shrinking other volume? Windows Server 2019 has the same needs, the new Server system when initialized, we may forget to partition the disk and leave the entire disk as C Drive, once it’s running, we found that’s a waste of free space, we can shrink the large partition and create some new partitions for better data categorizing and managing
Like we extend volume on Server 2019, we still have 4 ways to shrink a volume when Windows 2019 has a large partition need to be better managed on the disk. Yes, you guessed that, four methods are:
Disk Management
Shrink Volume in Disk Management is still the first option especially when dealing with new operating system, like Windows Server 2019, since you don’t need to worry about the shrink volume option may fail. It goes on really well on fresh system, here’s how to shrink volume on Server 2019:
- Right-click on the Start button and choose Disk Management
- Then in the disk map section right-click on the target partition and choose ‘Shrink volume’
- In the pop up shrink window, Windows will recommend the size that’s shrinkable, click ‘Shrink’ to continue, or manually type your desired volume
(if we shrink C Drive, we may get a disk map like this:)
Then Disk Management shall reload the disk map and you’ll found the ‘unallocated space’ is there waiting for you to create a new partition, currently we don’t see any error message after shrank or during shrinking, we’re not a heavy user on this build of Windows Server 2019, we shall, of course, do a through test on the formal edition, but this release has no conflicts with our programs, which will be shared in this passage later
However, if you can’t access the shrink volume function, you may check out our solution on Shrink Volume greyed out problem, or you can read on to find the alternative solution
Fix error: You can’t shrink a volume beyond the point where any unmovable files are located
Diskpart Command line
Use Diskpart to shrink volume is another common operation to manage volumes, steps are easy to follow and unlikely to run errors on new system. The following steps will help us:
- Press the Start button and type ‘diskpart’, right-click on it and ‘Run as administrator’
- Then in the command line window, type:
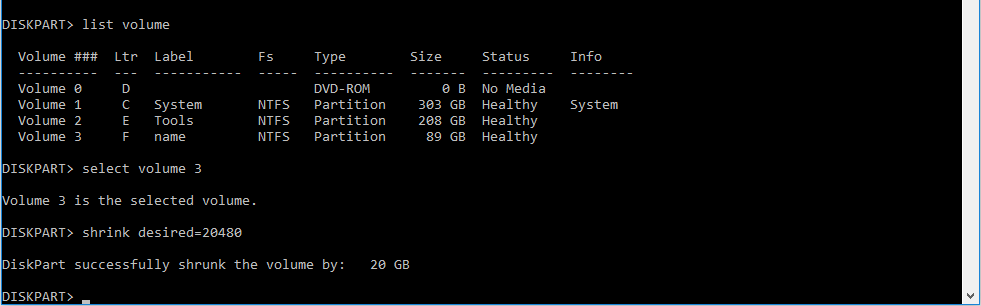
list volume > select volume C > shrink desired=20480to shrink 20GB out of C Drive
like the screen shot below, which shrank volume F for 20GB:
Will diskpart fail to shrink volume? Yes, when you can’t shrink volume in Disk Management, shrink volume command won’t work in diskpart command line tool either, they both share the same disk operation API, check the solution on shrink volume grayed out to find more info
Partition Expert
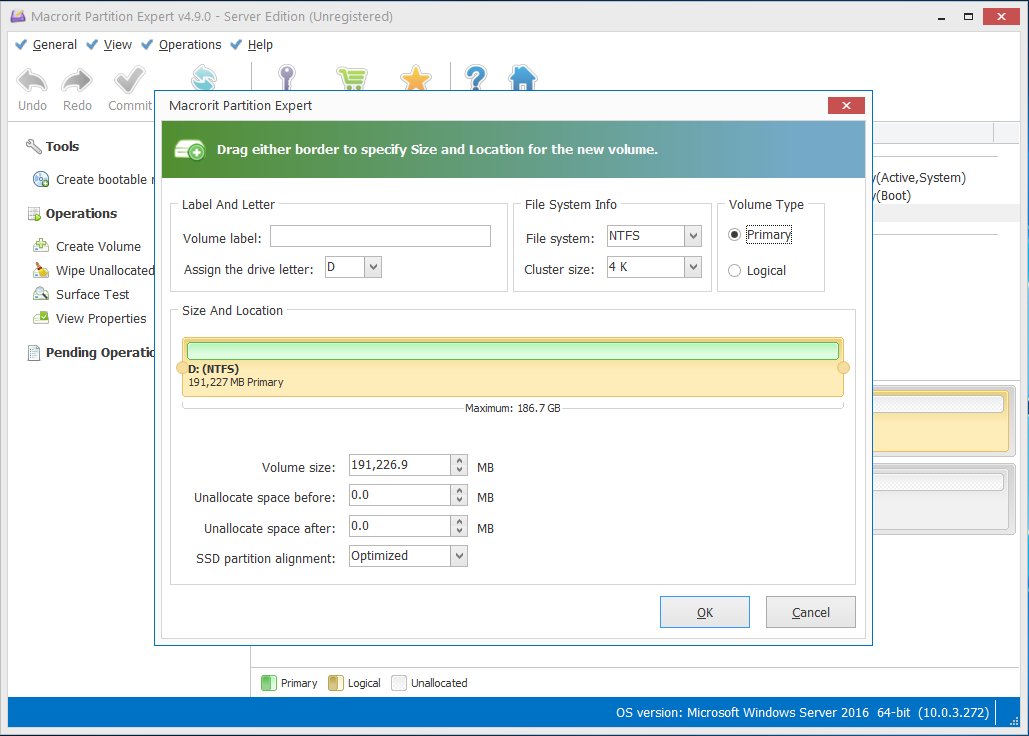
Third-party partition manager programs are the best when Disk Management tool and the dispart utility failed to perform their common disk operations. Partition Expert has all the basic features of the default tools, shrink volume one of the basic functions we built-in, but more stable. Partition Expert shrinks a volume like this:
- In the main interface we click on C Drive and then choose the function ‘Resize/Move Volume’ from the sidebar
- In the resize partition window, you can see a handler at the right side, the end of the partition, click on it and drag it leftward to shrink this volume, preview effect will be show in the disk map below, the bottom section of this window, click OK when you had enough free space
- And don’t forget to click the ‘Commit’ button in the first window, so Partition Expert will start to shrink the volume
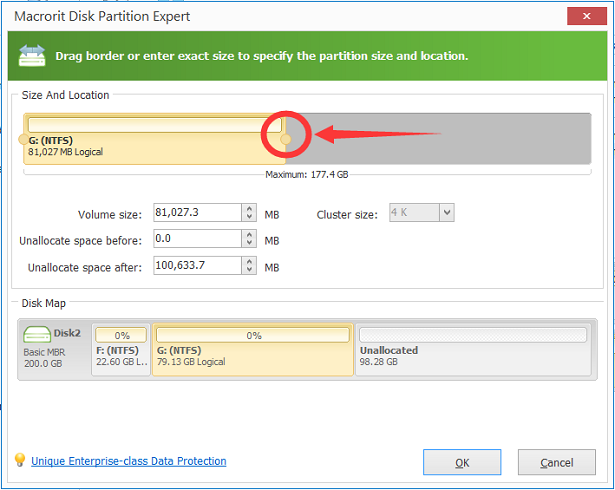 The screenshot above shows how to shrink G Drive
Since it a full functional partition manager, we can directly create a new partition on the unallocated space without running Disk Management again
Partition Extender
Although the name is ‘Extender’, it does shrink volume and extends another volume at the same time, say, shrink D drive and expand C Drive, if that’s what you need, then Extender is the perfect solution, since you don’t have to create unallocated space first and then do the extension step. Extender shrink partition while extends the other in the following steps if you got a disk map like this:
C Drive + D Drive + E Drive (optional)
- In the first interface click on C Drive (the drive we want to extend not shrink) and then click ‘NEXT’
- Then in the extend (shrink) window drag the handle to the right and you’ll see C Drive is expanding and D Drive is shrinking in the disk map down below
- Click OK and OK again to actually shrink D and extend C
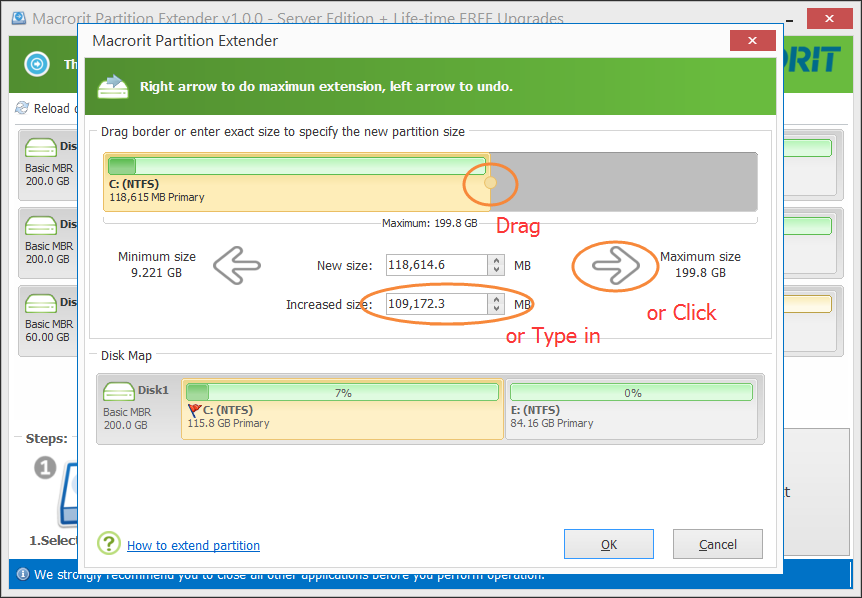 Extender shrinks E Drive at the same time
NOTE: Extender won’t work if there’s only one partition (C Drive, ie) on the disk, in this case, use Partition Expert will be a right choice
INFO: This guide Supports on other Windows systems too. Like Windows Server 2022, 2019, 2016, 2012, 2008, 2003 And Windows 11, 10, 8, 7, Vista, XP