How to Create a FAT32 volume larger than 32GB
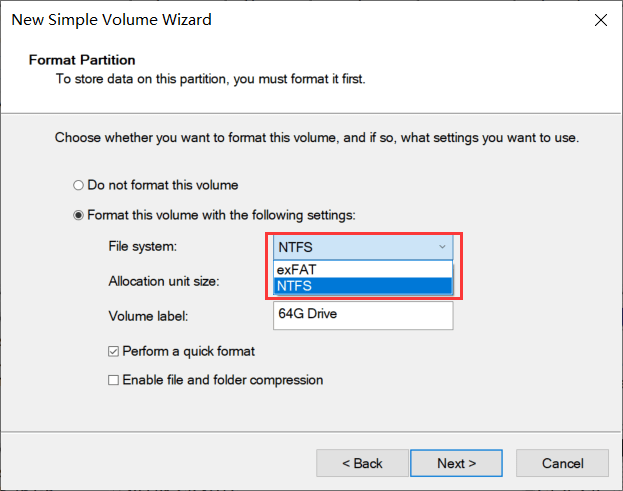
When we want to format a volume that is larger than 32GB, Windows default format option in the File Explorer right-click context won’t list FAT32 in the drop-down menu of the ‘File system’ nor in Disk Management, you’ll only see NTFS and exFAT(default), but how can we create a FAT32 volume on a 64GB or larger USB Drive?
Why would we insist on FAT32 partition anyway?
Check the table below:
File system comparison
| File system | Windows | macOS (<10.6.4) |
macOS (>10.6.4) |
Ubuntu | PS4 | Xbox 360/One |
|---|---|---|---|---|---|---|
| NTFS | Yes | Read Only | Read Only | Yes | No | No/Yes |
| FAT32 | Yes | Yes | Yes | Yes | Yes | Yes |
| exFAT | Yes | No | Yes | Yes (with ExFAT packages) | Yes (with MBR, not GUID) | No/Yes |
FAT32 is supported by every OS and Game console, NTFS is read only on macOS, exFAT is acceptable by modern OS but with conditions as for me, FAT32 is for the USB drive to transfer data between my PC and Mac, and the drive is 64GB, I’ll use the alternative ways of creating a FAT32 volume
1. PowerShell format to large FAT32 partition
We can using the following steps to create a partition with FAT32 file system which is large than 32GB in size:
- Right-click the Start button on Windows 10, or press Win+X instead
- Click the Windows PowerShell (Admin) option
- Click Yes to the UAC (User Account Control) dialog
- Type the command:
format /fs:fat32 x:to format (replace X with the the real drive letter you’d like to format) - Type
Yto confirm the warning
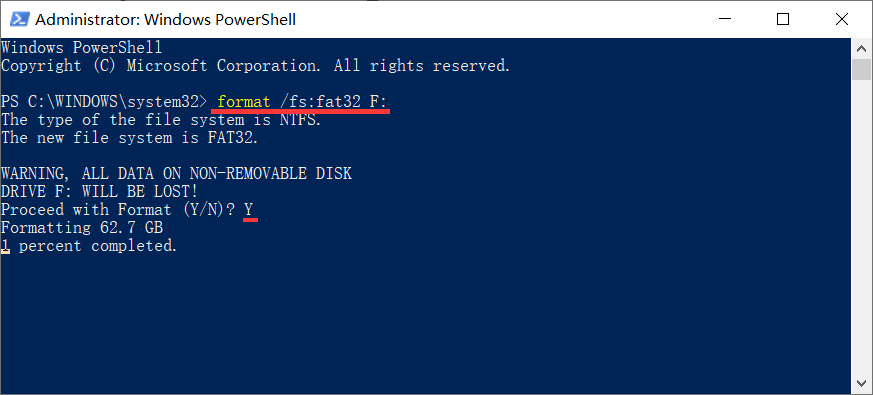
(takes 1 min from 0% to 1%)
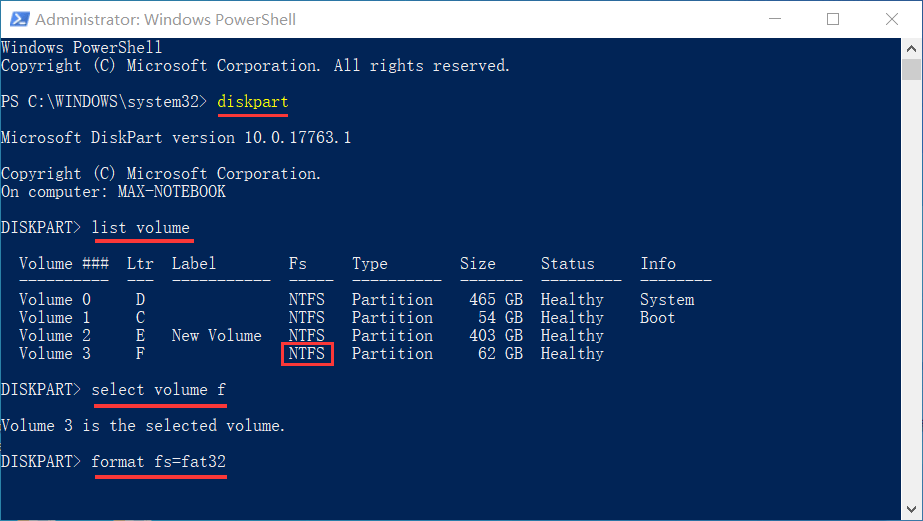
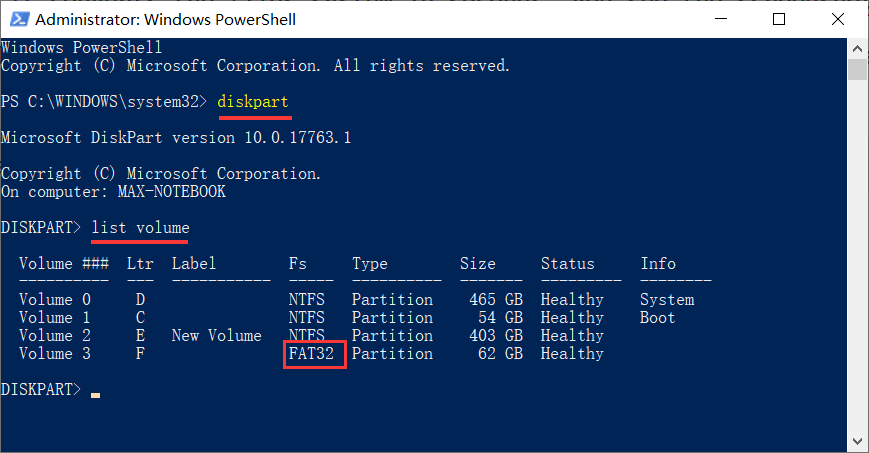
If you don’t know which drive letter is, use the following commands to check and format in PowerShell:
- diskpart
- list volume
- select volume X
- format fs=fat32
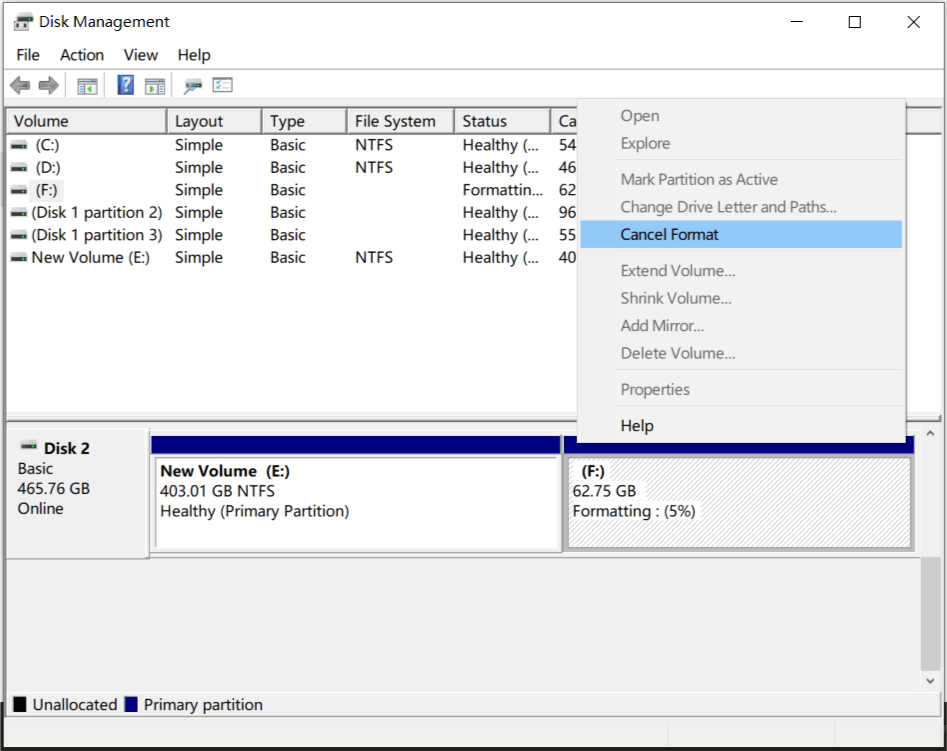
Then PowerShell will start to format this volume, but this operation is buggie, I closed out the PowerShell window after typing those commands, but when I open Disk Management, it is still formatting, when I right-click on this volume and click Cancel format, guess what? nothing happened, the format process continued, and it does take me 5 minutes to reach 10%, and howtogeek shared his time on this operation: almost one hour on 64GB FAT32 formatting, also many other users had reported that this method is super slow on larger drives, Do we have a faster alternative?
Yes, read on
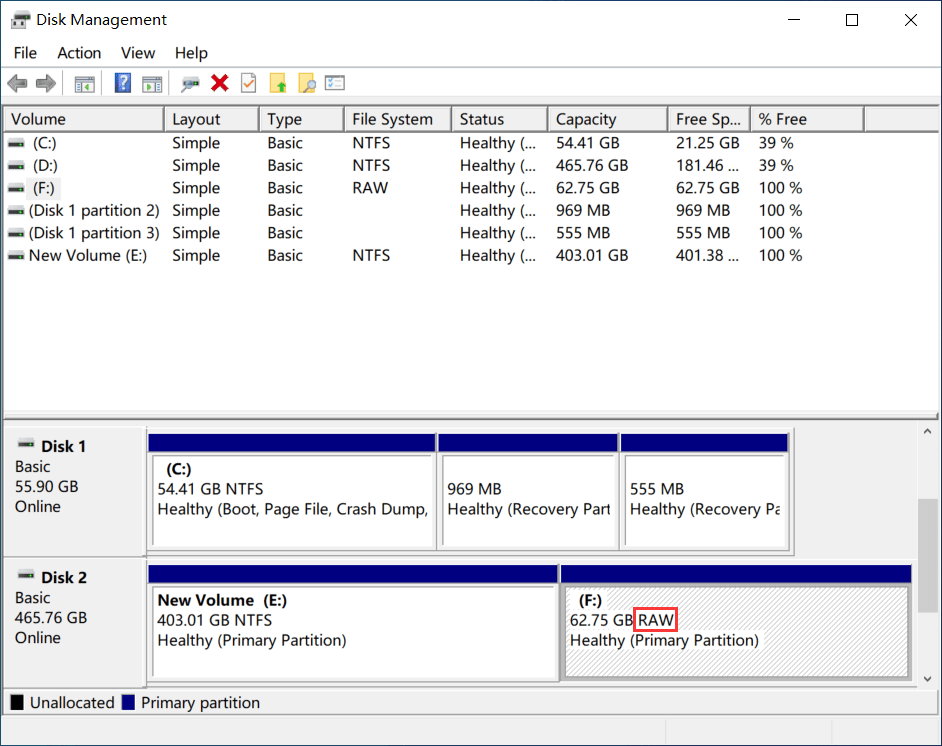
Side note: Don’t close Disk Management when it’s formatting a volume, or next time it will hang when you re-open it, and after it reaches 100%, the partition will become RAW
So don’t close the PowerShell or CMD tool when formatting, if you do have to cancel it, press Ctrl+C
2. Third party FAT32 format tool
PowerShell and diskpart performance slow when formatting to FAT32, we don’t have to wait that long to get a large FAT32 partition ready, alternatively, we can use other third party FAT32 format tool to save us a lot of time, the tool I’m about to use is Partition Expert Free Edition (freeware and portable), download this partition manager and we’ll start with the following step:
- Run Partition Expert directly from the portable package and click Yes to the UAC dialog
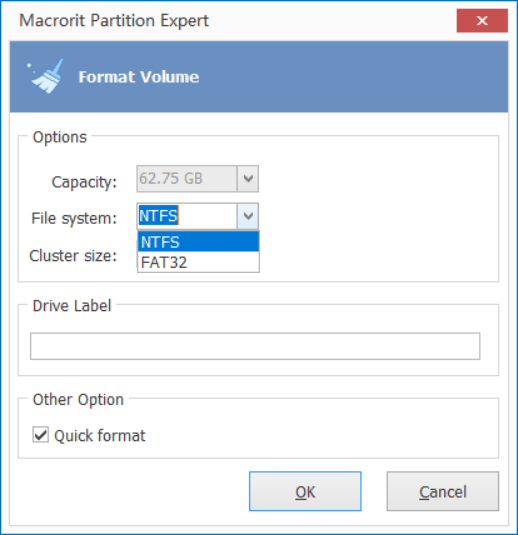
- Right-click on the partition you’d like to format and choose Format Volume
- In the format window choose FAT32 from the drop down list of ‘File System’
- Click OK and Commit
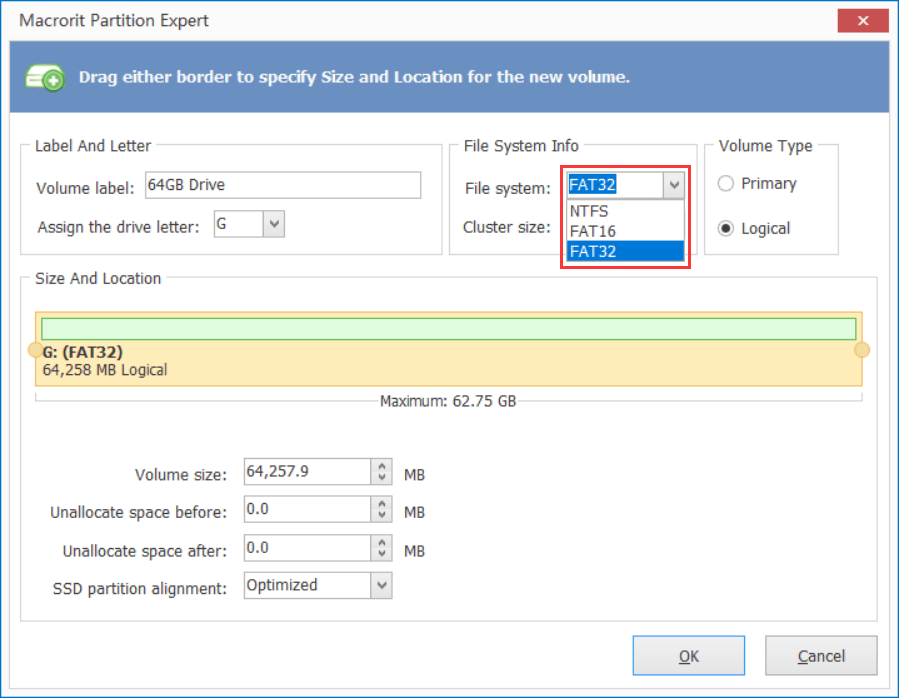
If the USB drive you connected shows as ‘unallocated space’, you can create a large FAT32 partition directly in Partition Expert, to do so please follow these step:
- Click on the unallocated space and choose Create Volume
- In the create volume window choose FAT32 from the file system section (NTFS, FAT16 and FAT32 are available)
- Then click OK and Commit this operation in the main window
This alternative method is faster than the built-in tools, it formats to FAT32 partition within seconds
3. Convert NTFS to FAT32 without data loss
Sometimes the USB Drive is NTFS formatted and we have stored data on it, we can of course copy data to other volume first and format the drive to FAT32, and then restore data back to the drive, that is OK when you don’t have much files on the drive, but the copy out and copy in process will take much time when the drive is fulled with data or almost full
Instead, we can directly convert the NTFS drive to FAT32 without data loss in Partition Expert or our freeware NTFS to FAT32 Converter, click on the link to learn more and download
How to convert NTFS to FAT32 in Partition Expert:
- Right-click on the target NTFS partition and choose Convert to FAT32
- Click OK to confirm and Commit this conversion in the main window
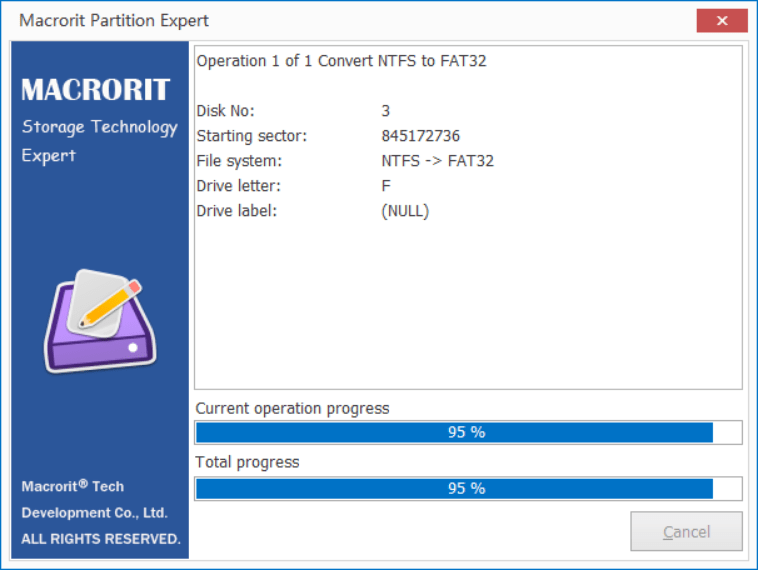
This operation is fast too, it converts the files system in seconds, you see the screenshot above, it take less than a second to reach 95%, that also the time I press the Win+Shift+S shortcut to take the screenshot in Windows 10.
Now let’s run PowerShell again to check if we have the partition created/converted
Other Utilities