How to disable auto page file size managing in Windows 10
A page file is a hidden system file on a hard disk, it’s optional and can be used for back system crash dumps and extend virtual memory, check here to find the official definition and usage
The page file is which grayed out options in Disk Management (Shrink Volume and Delete Volume), we can disable it if we want to use the shrink volume when there’s much free space available on the disk and when we want to delete a partition to create unallocated space
Steps to disable auto page file size managing
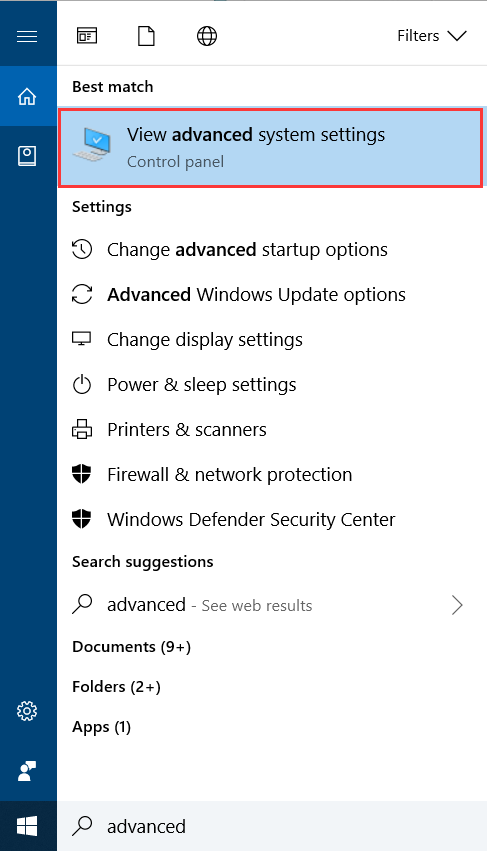
- Type ‘Control panel’ and press Enter to run it, then click ‘large icons’ in ‘view by:’ section, then click ‘System => Advanced System settings’. Troublesome? type ‘View advanced system settings’ instead and press Enter
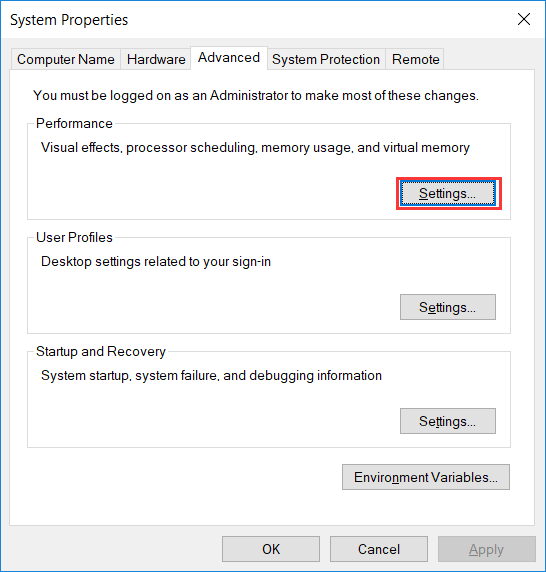
- The click ‘Settings’ under the ‘Performance’ Section, which manages visual effects, processor scheduling, memory usage, and virtual memory.
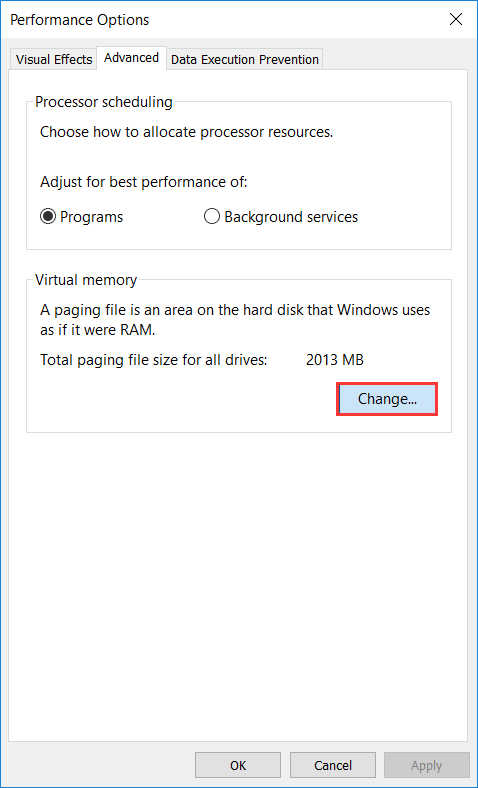
- Click the ‘Advanced’ tab and click ‘Change’ in the ‘Virtual memory’ section which shows us ‘A paging file is an area on the hard disk that Windows uses as if it were RAM’
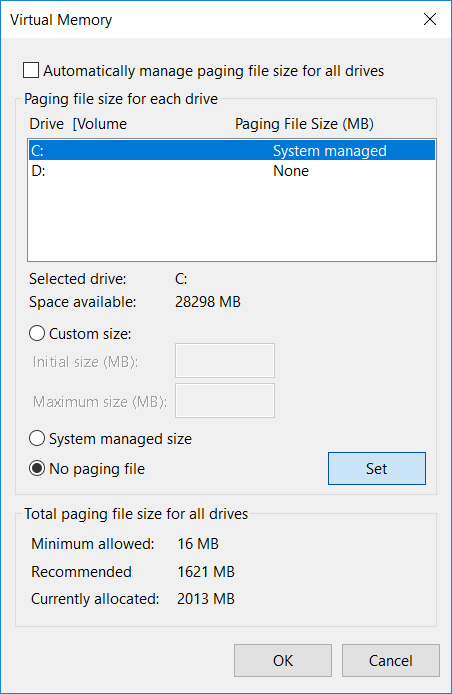
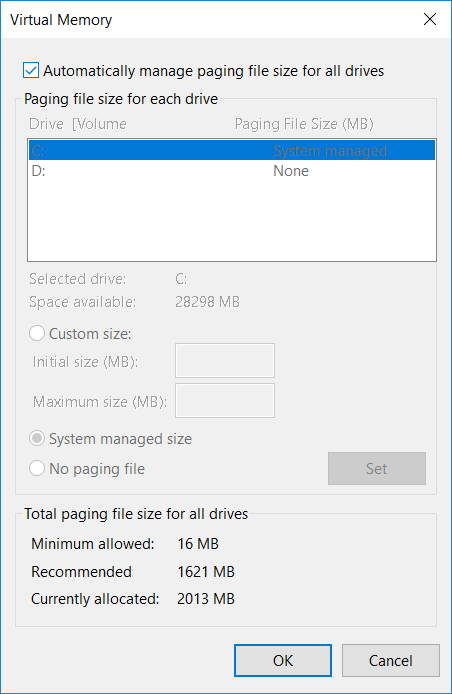
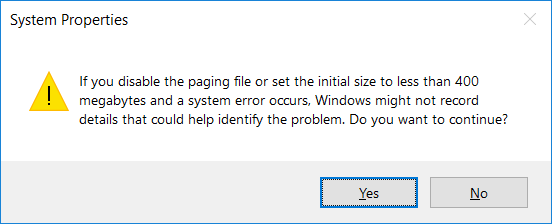
- In the Virtual Memory window, the ‘Automatically manage paging file size for all drives’ option is checked as default, uncheck it and select a drive from the list below, and input custom size or use the system managed size, or click No paging file, and then click ‘Set’, do click the ‘Set’ button although it has no hints for clicked effect, click OK and confirm to the warning message
Tagged under:Resize Server