Low disk space problem on the Recovery partition D/E
Scenario: Dell Inspiron 5537 user get low disk space problem on the recovery partition with a drive letter E, Extend Volume and Shrink Volume options are grayed out in Disk Management
Solution: The Recovery partition is not supported to have a drive letter, remove it will fix the problem, of course, we can extend this volume with more free space but there’s no need to do this, it’s not a good idea to mess up with the recovery partition, we can use the free space to create a new partition and manage data on it instead using the recovery partition as a data volume
Three methods for the solution:
- Disk Management change drive letter
- Diskpart remove the drive letter
- Partition Expert change drive letter
Disk Management Change drive letter
Press Win+R and type diskmgmt.msc to open Disk Management, or just simply right-click on the start button and choose ‘Disk Management’ to run (Windows 10) and then:
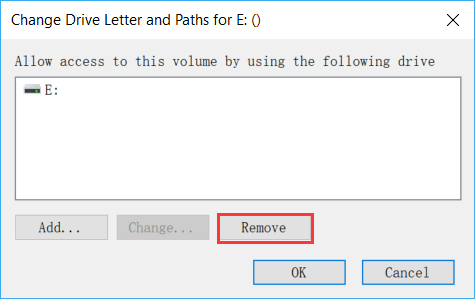
- Right-click on the Recovery partition
- Click Change Drive Letter and Path…
- Click Remove
When the warning message says “Some programs that rely on drive letters might not run correctly. Are you sure you want to remove this drive letter?”, click ‘Yes’ to confirm and remove it
Diskpart remove the drive letter
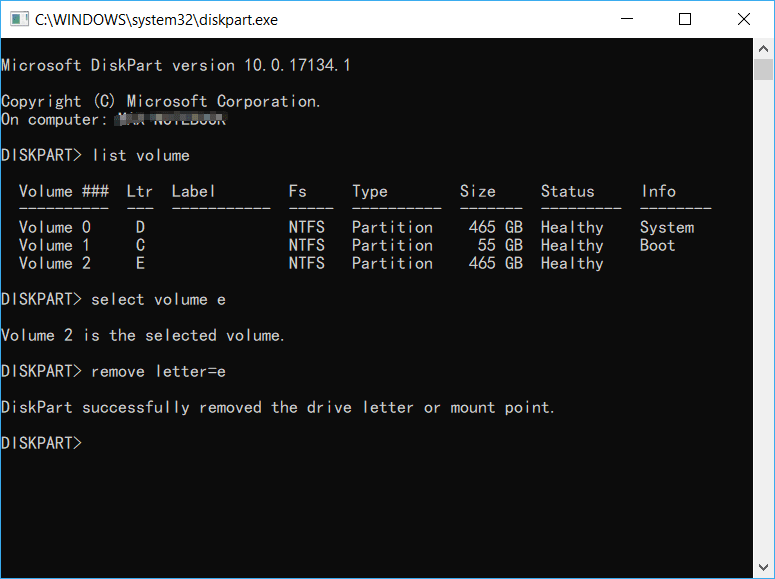
Press Win+R and type diskpart and press enter to run the command line tool and then:
- Type
list volumeto list all the volumes with a drive letter - Type
select volume xto select the recovery partition - Type
remove letter = xto remove the drive letter
Then diskpart will show a successful message saying: ‘DiskPart successfully removed the drive letter or mount point’
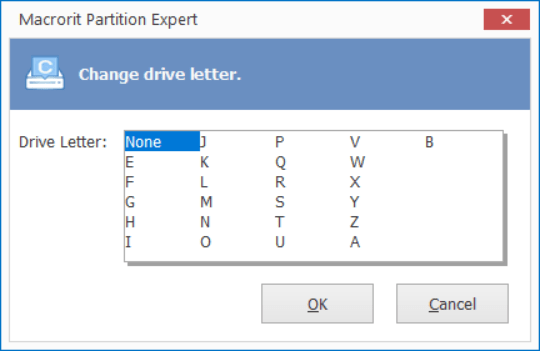
Partition Expert change drive letter to NONE
If you’re using this partition software, change or remove drive letter is an easy job, do the followings in Partition Expert:
- Click on the recovery partition
- Click Change Drive Letter function from the sidebar
- Choose None and click OK, Commit
Or, you can use the Hide Volume function to remove the drive letter, the same effect, the difference is that when a volume is hidden, next time you click on it the function list will show “unhide volume” instead, and in Disk Management, you can’t use the change drive letter function to unhide it, you can only use Partition Expert to unhide it, so we recommend the change drive letter function for this page’s purpose
Other Utilities