Delete Volume in Disk Management grayed out
Can’t delete volume in Disk Management, the option is grayed out
My C Drive is about to run out of space, I know I can delete a partition and create unallocated space for C Drive expanding on D Drive, but only to find out the delete option is grayed out, how can I fix this?
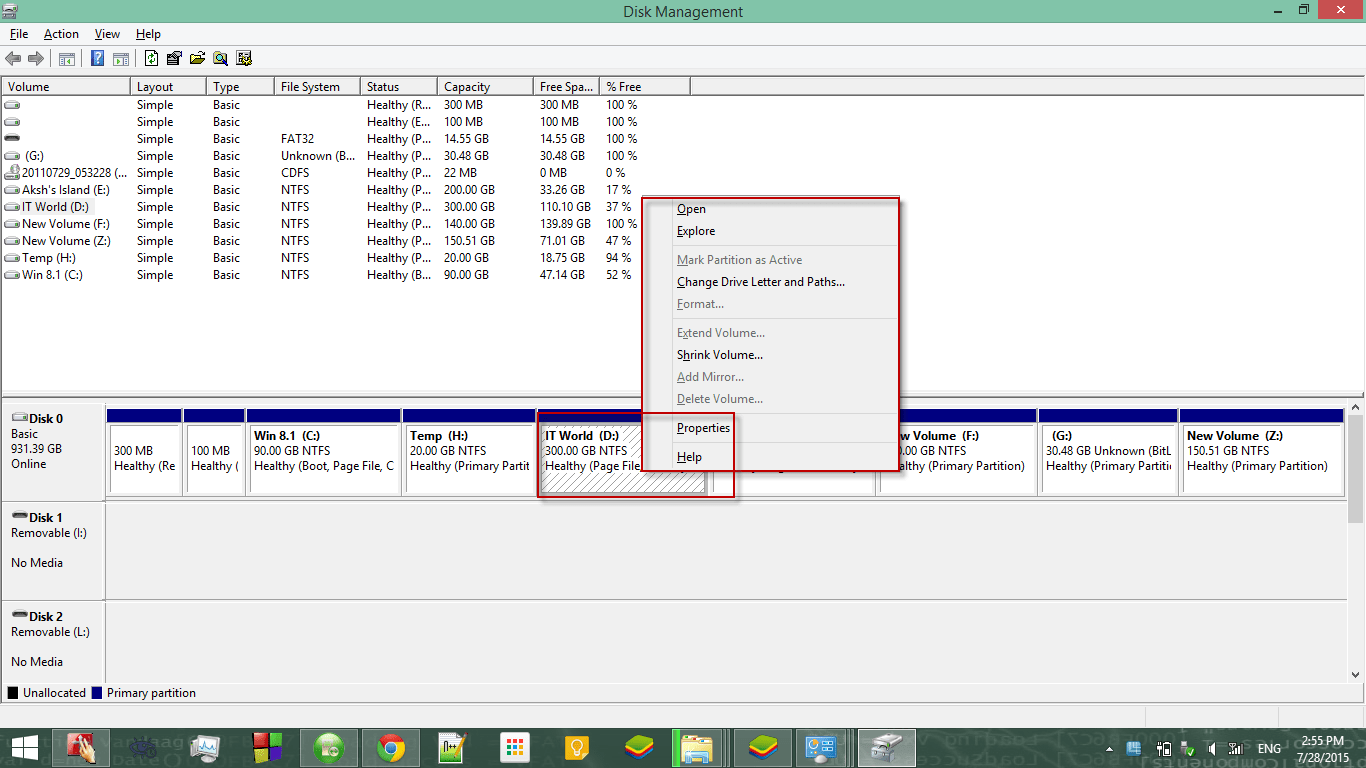
Delete Volume option grayed out Reason
There are mainly two reasons for the target drive to gray out the option:
- The volume has system installation files
- The volume has page file in it
System won’t let us delete itself when it’s running, so the option is grayed out in the right-click menu of the system partition
About the Page file
Page file, or the swap file, pagefile, and even paging file is a hidden system file on your drive with the name extension of .sys, it is related to the virtual memory, that’s to say, when the computer’s RAM (memory) is getting full, the OS will move some of the data from RAM to hard drive, to the pagefile.sys file on the hard drive
When we enabled pagefile on the partition, we enable virtual memory on it, since pagefile is a form of virtual memory. The ‘Delete Volume’ option will gray out when this file is in the volume, we can manually disable pagefile to activate this option again
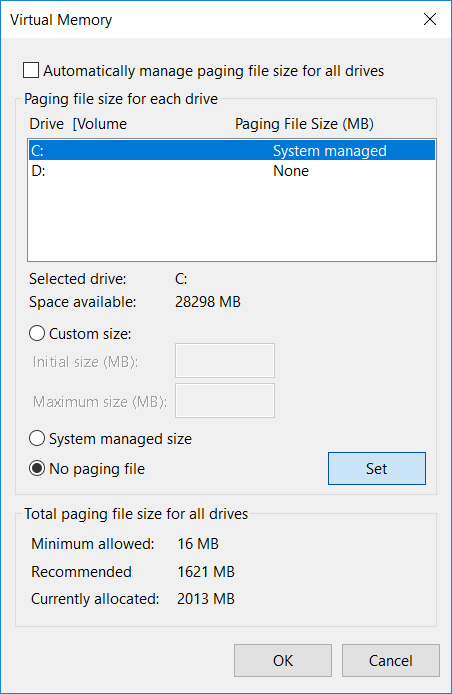
It’s better to enable this feature after successfully delete the volume, Having a page file won’t affect the computer performance, and some programs require this feature enabled before run
After we disabled the pagefile, run Disk Management again, or click Action > Refresh, then you should see the status of the partition shows Healthy as before but no Page File in the brackets, now right-click on it, the Delete Volume option is now active
I can end the guide here, but I think I can add more suggestions the question, how to fix and how to extend, I have better solutions instead of disabling pagefile
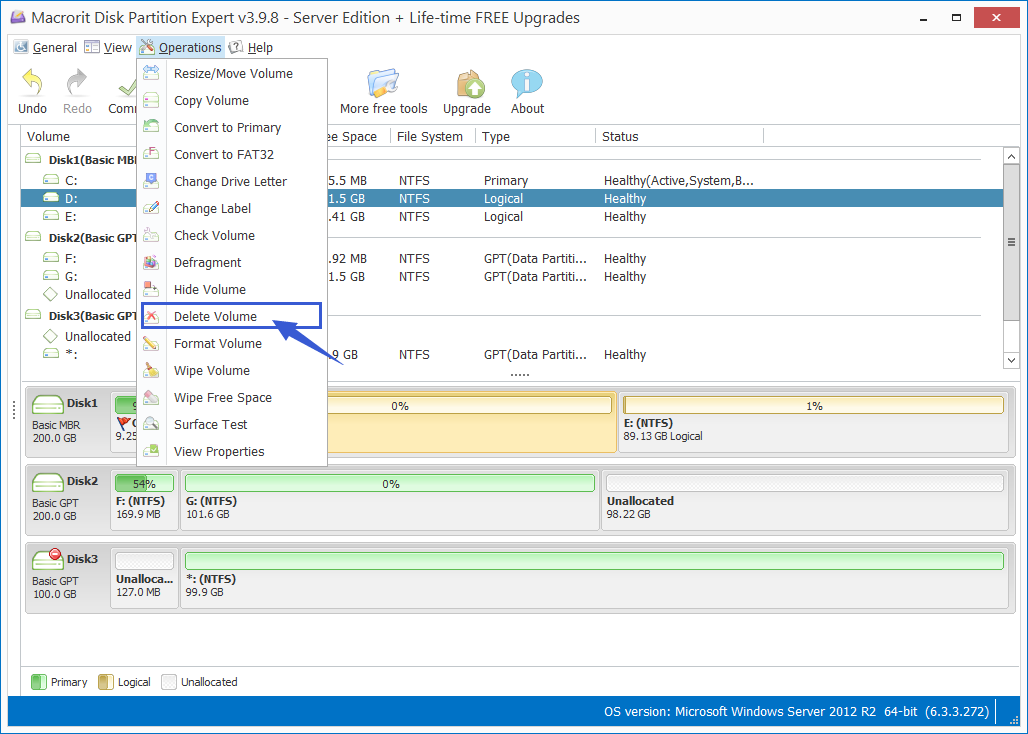
Delete Volume in Partition Expert
Partition Expert can be treated as the Disk Management alternative partition manager, it has more and powerful functions than the built-in tool, also it’s portable and has both 32-bit and 64-bit editions, we’ll use run the program from the portable package directly without installing
How to delete a volume
When the Delete Volume option is grayed out in Disk Management, we can delete it in Partition Expert within the following steps:
- Click on the target volume
- Choose the function Delete Volume from the sidebar
- Click Yes to the confirmation dialog
- Click Commit
Extend C Drive in Partition Expert
In this example our goal is to extend C Drive, I think to delete D Drive is not enough, we have to delete the H Drive too, according to the screenshot above, but if your D Drive is right next to C, you can go ahead and use the Extend Volume function on C
In Partition Expert, we don’t have to delete D Drive, we can shrink it instead to get free space for C Drive, steps are like this:
- Right-click on D Drive and choose ‘Resize/Move Volume’
- Drag the header handle to the right to create unallocated space, click OK
- Click on C Drive and ‘Resize/Move Volume’ on it
- Drag the footer handle to the right to merge unallocated space, click OK
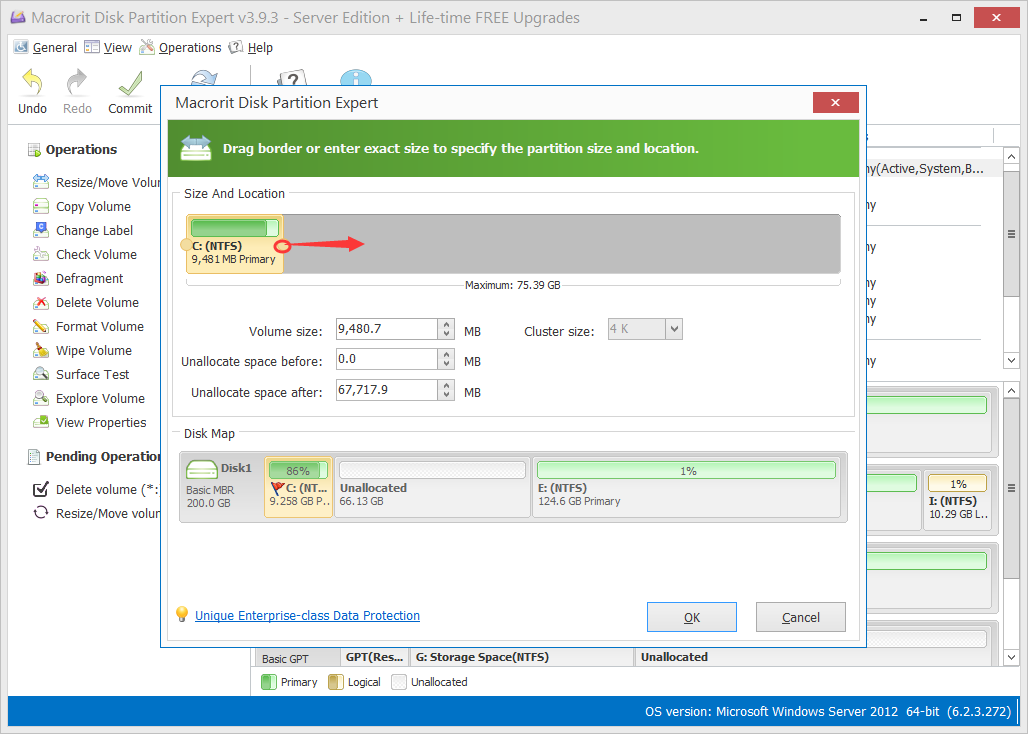
And click Commit to extend C
If H Drive is in between C and D, click H and ‘Resize/Move Volume’ it, drag the entire H to the end and unallocated space will go the head
Directly extend C in Partition Extender
In Partition Expert we firstly created unallocated space, but in Partition Extender, we don’t have to do this, we can directly extend C within the steps below:
- Click on C Drive and click Next
- Drag the handle to the right and click OK for twice
Tada! C Drive get extended, no need to delete the entire partition but get part of the free space, no need to make space unallocated first, simple stuff, really handy
If H Drive is in between, we click on H drive first and extend it, then click C to do the final extension
