Erase data before selling computer
Why should i erase data
Erase data is a step to prepare a clean hard drive before selling, you may have deleted person sensitive or private data after you decided to sell the old computer, but that's not enough, deleted files can be recovered by and data recovery programs without any efforts.
If there's nothing important on the disk, erase the hard drive is the securely way to protect personal info and habits.
How to erase data
Unlike MacOS, Windows has no default way of erasing free space even after Windows 10 releases.
To erase data on a hard drive we're about to sell, we need to hire some third-party data erasing software, Data Wiper is the one we're going to use and it's easy to use and make data clean again, here's how it works:
- In the main interface click on the drive we want to erase (since we're about to sell the computer and we have deleted all the info, we need to erase all the drives we created), click on the C Drive, for example
- And click on Wipe free space and in the first section and choose a wiping plan from the second section
- Click Wipe Now and type in the confirmation keyword 'Wipe' to continue
Have questions about wipe free space? check this page and learn more.
Effective ways to completely erase a hard drive
Wiping free space is one method to make disk clean again after manually deleted files, it's fast and a recommended way to erase data before selling for most of the users who want to keep the operating system, but for those who want to erase everything include Windows, wipe free space is not enough.
Wipe entire drive
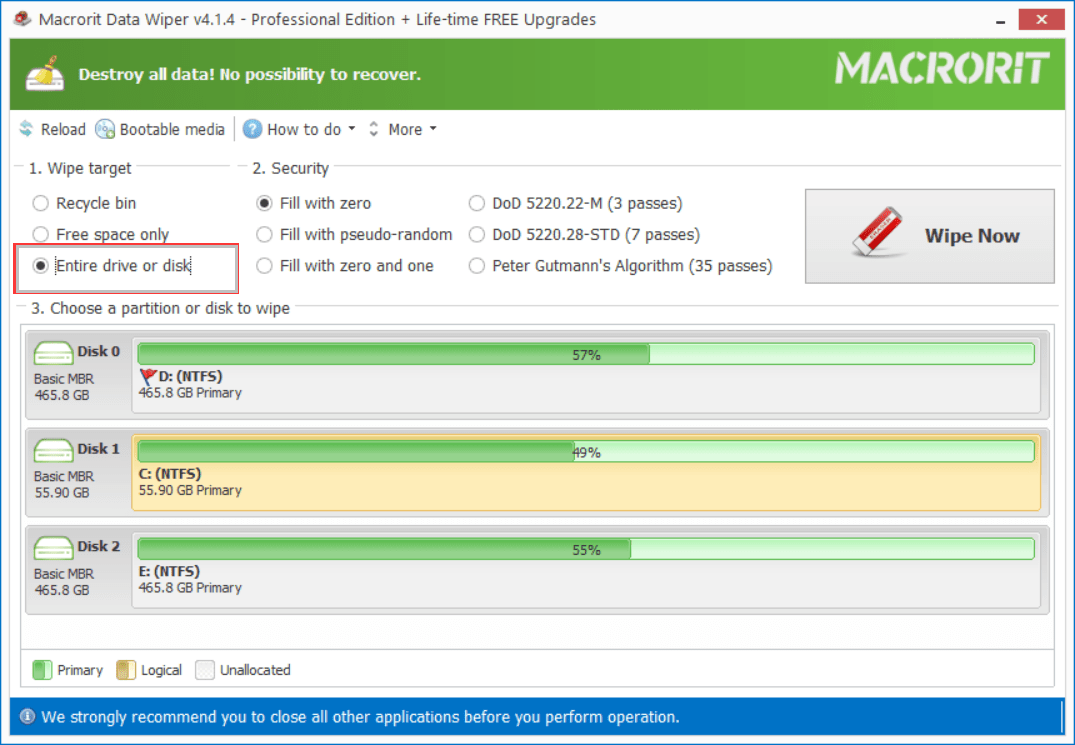
Wipe entire hard drive is the function used when you want to wipe the operating system drive along with other partitions, in Data Wiper, you can do the followings to wipe system partition:
Method 1: If you want to wipe Windows when it's running, do the followings:
- In Data Wiper click on the system drive and click on Wipe Entire drive and choose a wiping method, one pass filling method is enough to make this drive clean, but you're free to choose the DoD plans
- Click Wipe Now and type the keyword 'Wipe' to continue, the you can't boot Windows again unless you reinstall Windows
Perform this operation After you have wiped other partitions is more convenient that Before doing this.
Method two: If the computer fails to boot, try this instead:

- Download and Run Data Wiper from another functional computer, while downloading(may take seconds), prepare a blank CD (CD-R, or CD-RW, the last one is recommended) or USB
- Click Create bootable media from the menu and follow the guide to create the bootable ISO file of Data Wiper (3 steps)
- Then insert the blank media (CD or USB) and burn the ISO file to it, if you haven't installed any third-party burning tool, just right-click on the ISO file and click Burn to burn to bootable CD, and use Rufus(the free portable USB burning software) to create bootable USB
- Eject the CD or plug out the USB and insert or plug it into the target computer, then start the computer and change the boot order to CD or USB, reboot
- In the WinPE Data Wiper click on the system volume and click Wipe entire drive and choose a wiping plan, click Wipe Now
You can do the after wiped free space on other deleted partitions, or before wiping them, it doesn't matter, since after wiped system partition, you're still there in the WinPE system, you can do other wiping operations.
Wipe entire disk
Instead of wiping the entire drive, we can actually wipe the entire disk when files on other partitions haven't been deleted but need to wiped as well. The Wipe entire disk is the same option with Wipe entire drive, the difference is click on the Disk instead of the Drive before wipe.
Note: Wipe entire disk will take longer time than wiping free space and you really need to wipe the disk once (one pass overwriting) to make the disk clean again.