Wipe or Delete system partition
In the previous post, we talked about how to delete the source system partition after successfully migrated OS to new SSD, but when the source disk was virus affected, delete the volume is not enough to ensure a clean hard drive, we’ll wipe the new partition instead
Windows 10 has it’s method of keeping OS and remove everything function, but that’s overkill for the situation when we had system installed on SSD, and data partitions on another disk. If we use the default method, we’ll have to remove all the files and folders on the data disk, that’s definitely not what we wish. To wipe only one partition (old C Drive), we can use Data Wiper instead
portable edition is also available
Wipe virus affected partition
Run Data Wiper and confirm this operation in the UAC dialog, then you’ll see the main window of this data wiping software. In section 1 functions are listed there: Wipe recycle bin, Wipe free space, Wipe entire drive or disk. We’re about to use the wipe free space and the wipe entire drive function, just choose one of which to run
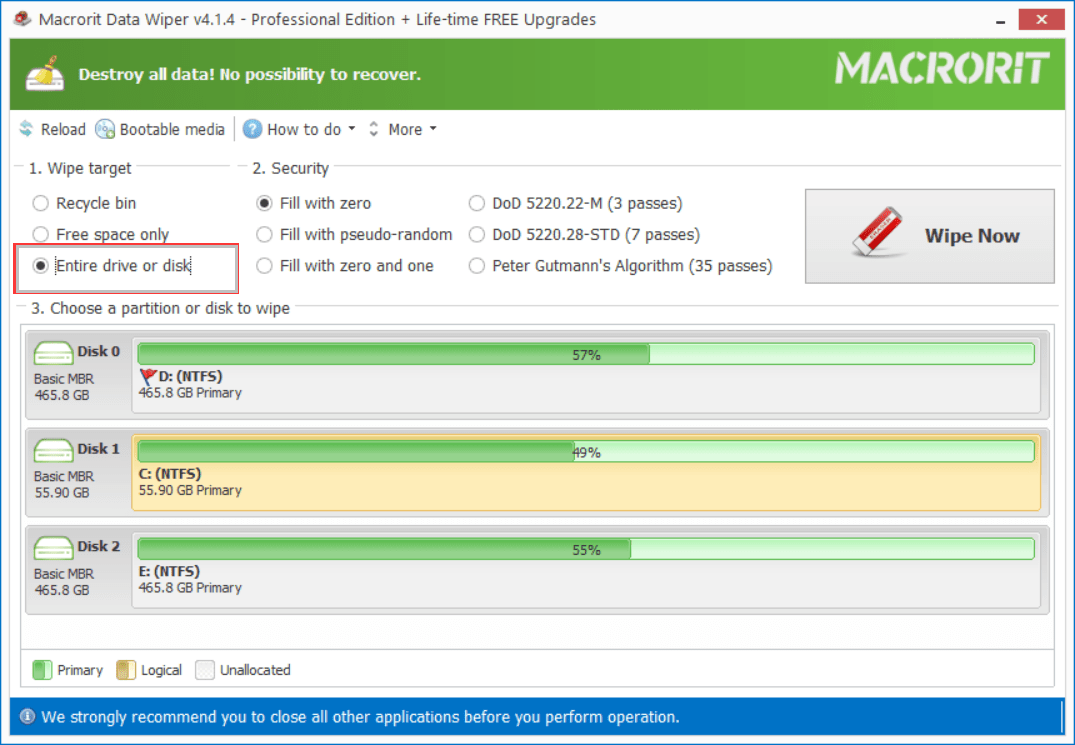
Wipe entire disk
In Data Wiper we click the ‘Entire drive’ option in section 1 and then choose a wiping method from section 2, where six different kinds of wiping algorithms are available, we set the simple and fast zero overwriting method as the default one, you can feel free to switch to others, but this one is recommended for most users, since we will use this disk later not get rid of it.
Then click on the original C Drive, check the partition label, it’s the not the new SSD C Drive, not the drive with a red flag, you can tell it from the disk-map, then click ‘Wipe Now’, confirm and type WIPE to continue
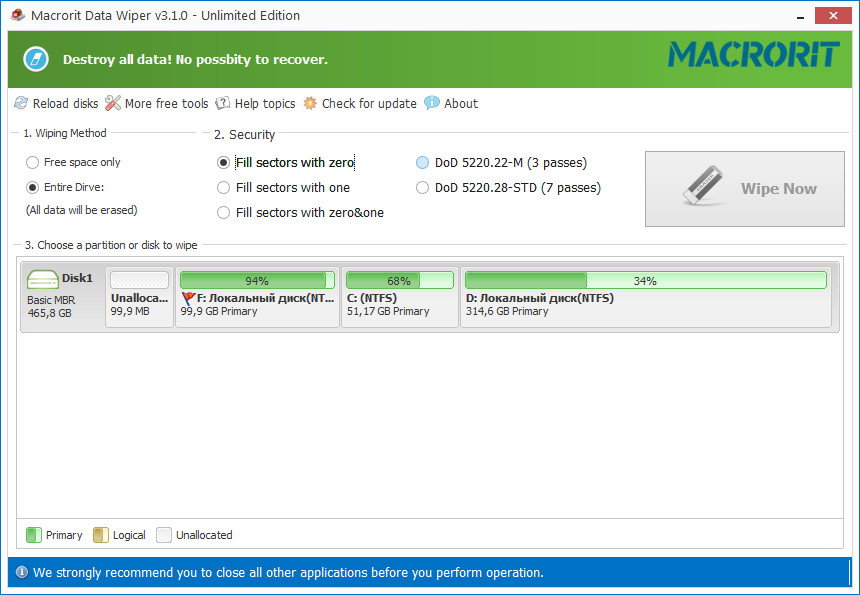
Wipe free space
If you had already deleted C Drive and created a new partition on it, you can wipe free space on it to make this volume clean again. In Data wiper, we click ‘Free space only’ option in the first section, and then use the default wiping method, then click on the new partition and ‘Wipe Now’ at last. Confirm, no need to type ‘wipe’ again, because wiping free space is safe, it only deals with the deleted space and empty space on the partition, it has no affect to the exiting data, you can continuously do your job with the computer, after the wiping process is completed, just ‘OK’ and the drive is clean.
Low level format
If you don’t want to install any program to wipe free space, you can download the portable edition of Data Wiper and directly run it from any portable devices. Still don’t want to use third-party programs? No problem, the Windows default overwriting method will solve the problem too: Low level format
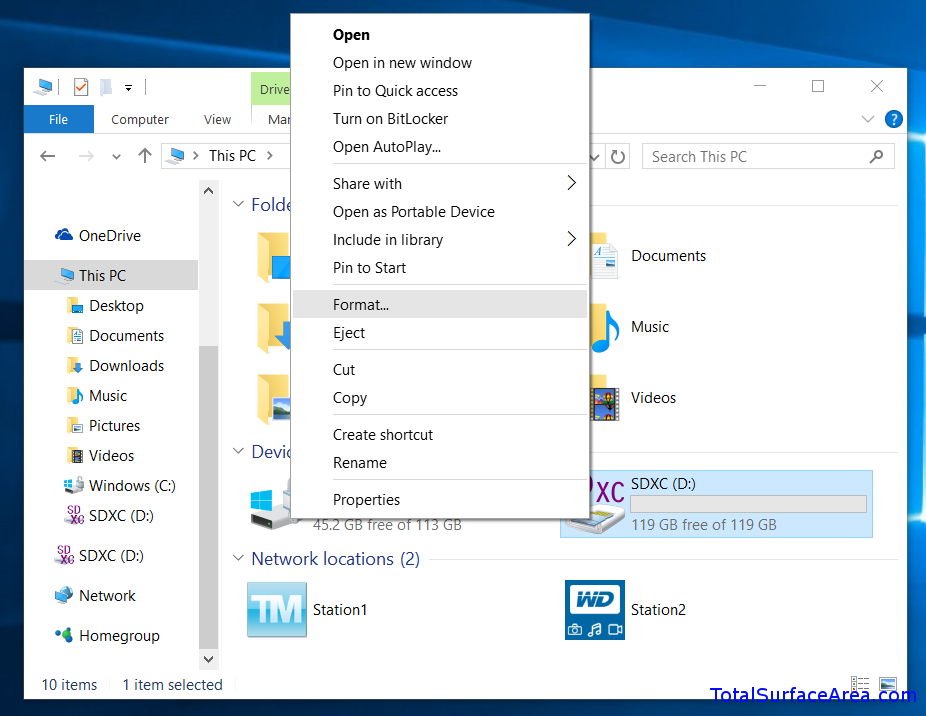
Where’s the low level format option?
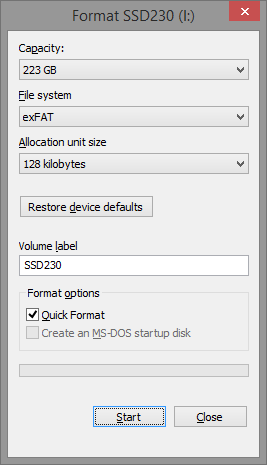
It’s not listed as an option in any window but go with ‘Quick format’, which is always an checked option in Disk Management and File Explorer, no clue? don’t worry, check the screenshot below or press Win+E to open File Explorer and right-click on the old C drive, and choose ‘Format…’ option like so:
Then in the format window, uncheck the ‘Quick Format’ option, you see, in the following screen snippet, this option is checked as default, we uncheck it and click ‘Start’ to perform a low level format
Since the low level format option is also capable of overwriting partition, why should we use Data Wiper, or any data wiping manager anyway?
No, you don’t have to, of course, but when taking low level format, you can’t use the computer to do other things simultaneously, the mouse cursor will spin for a long time, in Data Wiper, however, when wiping free space, you are free to perform other task, and you have many options to overwrite if the company you’re working at requires standard overwriting plans, like the DoD government scheme, for example.
You can also use Disk Management to low level format the partition, right-click on the start button in Windows 10 and choose ‘Disk Management’, then right-click the partition that has been affected, then click ‘Format…’, uncheck the ‘Perform a quick format’ option
