How to Use D Drive for storage
Contents:
When C Drive has not enough free space on the disk, Windows will pop up a warning message saying we have low disk space and ask us to clean up disk space, but the disk is actually not, it does have much free space
I think that message won’t confuse people when we have only one partition on the system disk, which is when C Drive is the only drive on the SSD will make sense for the error message
When C Drive is short of free space and there are no other partitions on the disk, we can use the cleanup method to free up some space, but this method won’t often provide a sufficient solution
Have no idea about this? Open Disk Management and check the disk map, you’ll get the point soon
Different disk maps
Disk Map A
- Disk 0
- C: Drive + D: Drive
Disk Map B
- Disk 0:
- C: Drive
- Disk 1:
- D: Drive
In Disk Map A, when C Drive is running out of space, we can extend it by using free space from D; while in Disk Map B, we can’t, C Drive and D Drive are on separated disks, they can’t share free space when they’re both basic disks
If you’re using dynamic disks, you can ignore this, but what we shared below will still work on this kind of disk
Change default file location in C Drive
Many users won’t keep the Document, Download, Pictures and Videos folders path to C Drive, the default location, but as time goes by, size of those folders are growing and eventually trigger the low disk space alert, if we can change the default path to D Drive, we can solve the low space warning problem and take full advantage of D Drive at the same time
Microsoft intro basic disk and dynamic disk
How to change the default path?
- Press Win+E to open File Explorer
- Right-click on the
Videosfolder - Click the Location tab and double-click the path to select all
- Type
D:\Videosin the field and click OK - Click Yes when prompted to move data
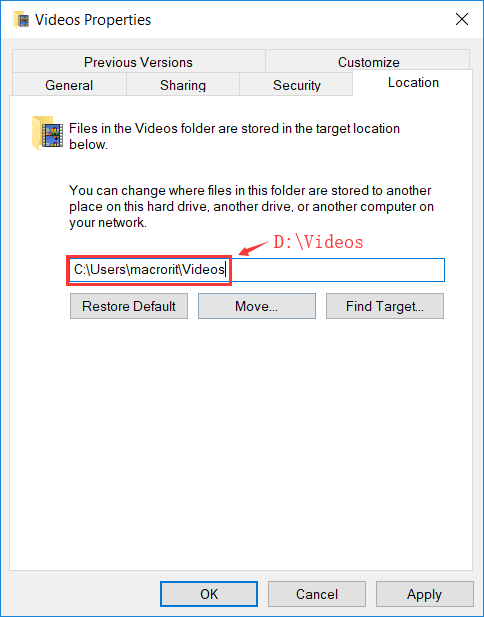
Then click This PC on the sidebar, C Drive now should have enough free space and not showing the red bar any more
And don’t forget to change the default download path in browsers like Chrome, FireFox, Edge, they all defaulted to download folder to C Drive.

And don’t forget to change the installation path when some programs need to be installed, take Partition Expert, for example, when the installation guides go the path selecting window, we can set the path like the screenshot below
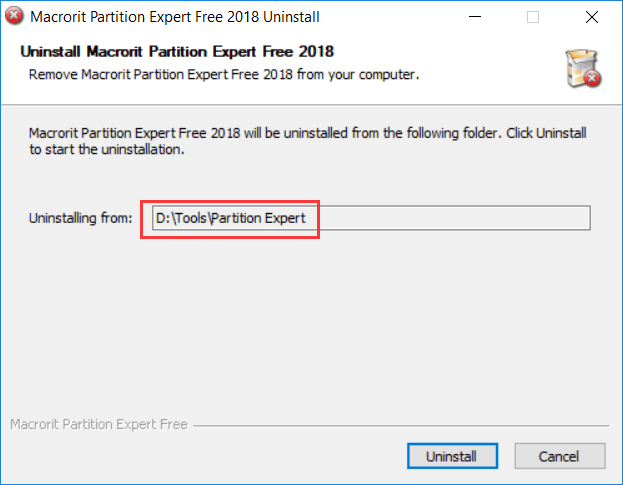
(In fact, Partition Expert also has a portable edition in the download package, if you don’t install it you can run this program from the portable package directly)
Shrink C Drive
If C Drive is the only partition on Disk 0, you can shrink it to 60G if it’s a big partition and has more than 60G free space after default folders location changed, Windows 10 needs about 23G to run smoothly, so if the disk 120G SSD, feel free to shrink it to 60G and create a new partition on it
How to shrink volume?
We can use Disk Management, diskpart command line, and third-party partition software Partition Expert to shrink a volume
Disk Management Shrink Volume
- In Disk Management right-click on C Drive
- Click Shrink Volume
- Type
61440(60G) to shrink
or use the default setting, now we created 60G unallocated space, right-click on it and click New simple volume to create a new partition
Diskpart shrink volume
- Press
Win+R and type
diskpartpress Enter - type
list volume - type
sel vol c - type
shrink desired=61440
sel vol c means ‘select volume c’
- Then we type
list diskinstead - And type
sel disk 0 - type
create partition primary size=61440 - type
assign letter = D - type
format fs=ntfs quick
To create a primary partition and assign a drive letter and then format it to NTFS file system so we can use it
If you’d like to create a logical partition on an extended partition, you can type the followings instead from step 3:
- create partition extended
- create partition logical
Then assign and format
Note: If Drive letter D is already taken by other partition, try “E” instead
Partition Expert shrink volume
- Run Partition Expert and click on C Drive
- Choose Resize/Move Volume function from the left sidebar
- Drag the handle on the right side to the left and click OK
Then in the main window we can see that unallocated space is created, and then we:
- Right-click on it and choose Create Volume
- Click OK to the automatically generated detail
- Click Commit in the top nav
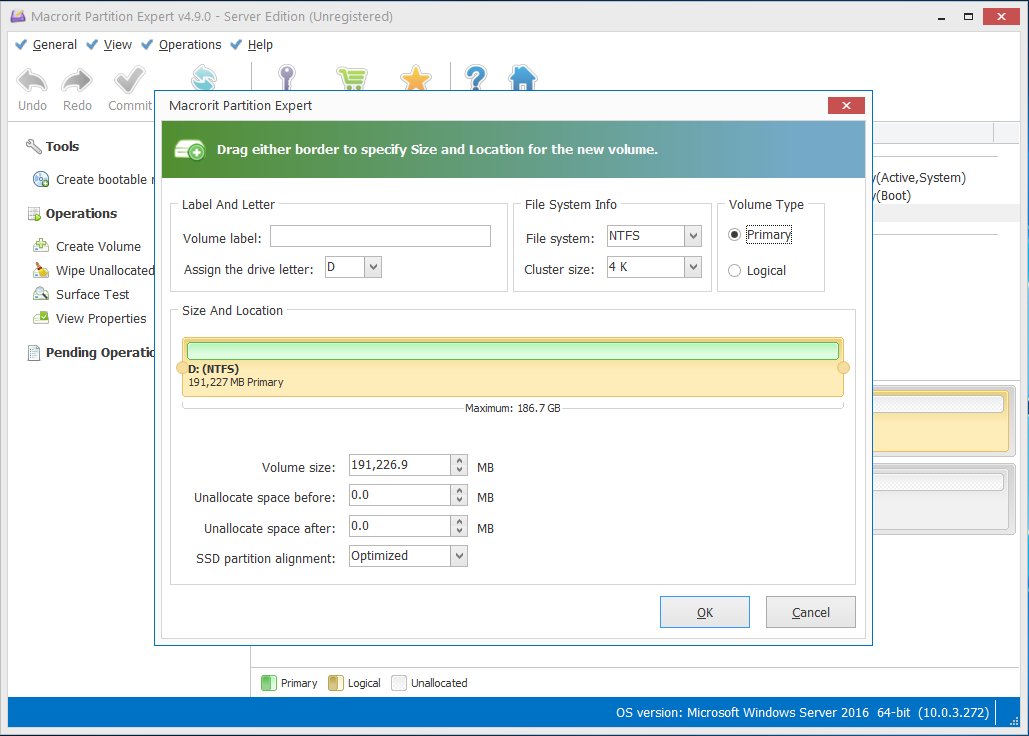
And we got a new partition created
Conclusion
When C Drive is running out of space, we can:
- Clean up disk
- Use D for storage
- Extend it
When C Drive has a large capacity of its size, we can shrink it to a smaller one and take the best usage of the disk, we can create a new partition to store personal data instead of messing up with the system files and folders
Next time when you download anything, feel free to use the default path prompted, since we have used D: Drive for storage, or you can manually set a path to any drive except C, let C just be the system area, keeps only what system related, it’s our duty to make this clean and rich in free space
BTW, Partition Expert is the perfect solution for disk partition managing, it’s the best alternative program if you don’t get used to diskpart command line methods and not-well-looking UI of Disk Management, and Partition Expert can do more than just resize a volume
