How to move partition unallocated space?
I can create unallocated space in Windows Disk Management, but I don’t know how can I move it to another partition, the primary partition, i.e., I have another partition stands between C Drive and unallocated space, how am I support to merge unallocated space to C without deleting D Drive, any ideas?
The Extend Volume option would still be grayed out even when unallocated space is created but not next to the target you’re about to extend, that’s one of the requirements of this function, the other condition is that the target partition’s file system needs to be NTFS instead of FAT32.
But the only way to make unallocated space at the right position (in front of the source drive, at the end of target drive ) is to delete the source one completely and make the entire area as unallocated, that’s not most of us want, we don’t want to spend time to backup and restore data after the extension completes.
Instead, we need to find Disk Management alternative methods to solve this problem without data loss and make the best out of unallocated space
Steps of moving unallocated space
We can use unallocated space in the following two ways:
- Move it to another partition
- Create a partition on it and merge it to another partition
Before we step into details, let’s download Partition Expert install it or run the portable edition directly and assume disk map like this:
I: Move unallocated space
- In Partition Expert click on D Drive and choose Resize/Move Volume function
- Drag the entire D Drive to the end of the bar
- Click on C Drive and click Resize function again
- Drag the handle on the right side to the end
- Click OK and Commit
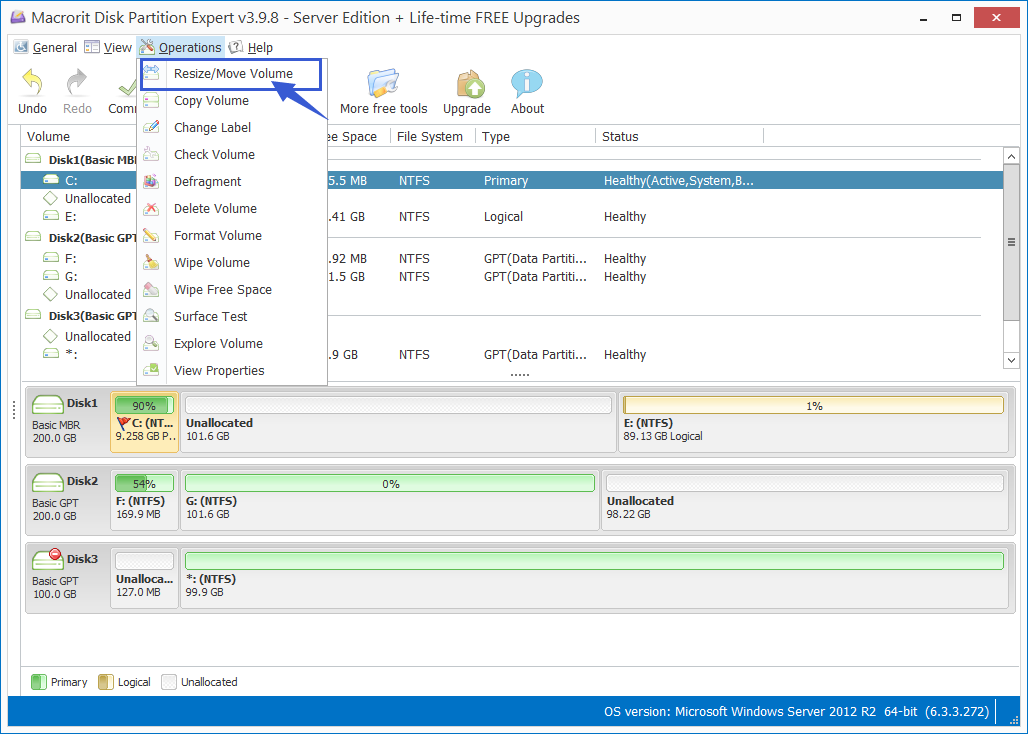
Step 1 & 2 are to move unallocated space ahead of D, so C Drive and unallocated space are contiguous, while Step 3 & 4 are to extend C Drive
II: Create a partition on Unallocated space
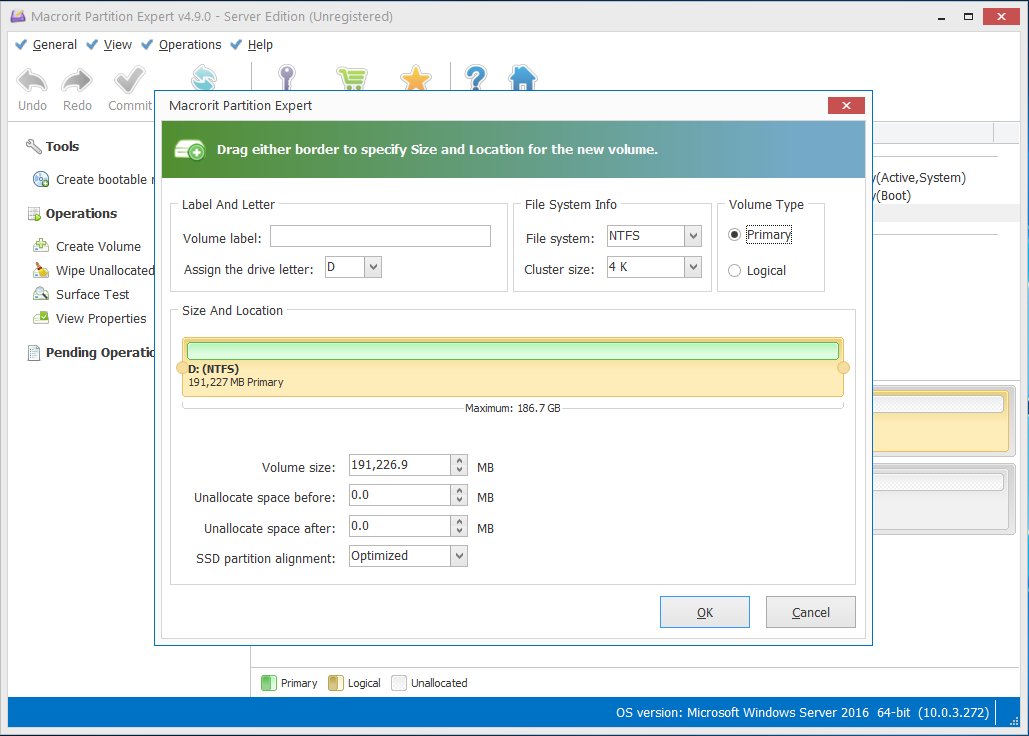
- Right-click on unallocated space
- Select Create Volume
- Specify the label, drive letter, file system, volume type, and volume size or click OK directly to use the default (recommended) settings to create an F Drive
- Click on C Drive and click Merge Volume
- Select Both C Drive and F Drive and choose C Drive from the drop-down menu of “Merge selected volume to:”
- Click OK and Commit the operations
Explanation: Steps 1 ~ 3 are to create a new empty partition with Drive Letter F, step 4 & 5 are to merge C and F as a large C, then in the root directly or C Drive there will be a new folder call “F”, which is empty, feel free to delete it
Try the simulator below to move unallocated space: hover to slide
Partition Expert alternative: Partition Extender
If we had a disk like the above, we don’t need to use Partition Expert to first move unallocated space and then extend it into another partition, or create a new partition and do the merge operation, although they both perform fast and harm no data, we do have a better and easier way to make full use the unallocated space, Partition Extender, one step to extend C and merge unallocated space and even shrink D at the same time if you need more space to enlarge C
Use unallocated space in Partition Extender:
Download Partition Extender and install, and run, or run it directly from the portable package, then try steps below:
- Click on C Drive from the disk map
- Click NEXT
- Slowly drag the handle to the right and preview the effect in the mini disk map, and click OK when it’s enough for C Drive extending
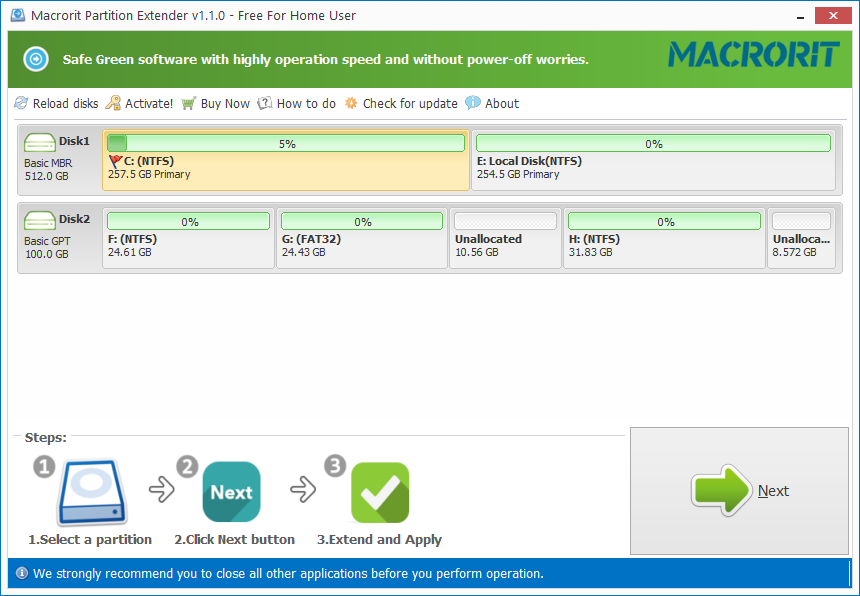
In the resize window, capacity of C Drive is getting larger and larger while you’re dragging the handle, and unallocated space is getting smaller and smaller at meantime, it will disappear if you don’t stop and D Drive will start to get decrease free space if you continue on, no existing data on both D Drive and E Drive will be affected during the dragging operation
Create unallocated space
Maybe you don’t have unallocated space on the disk, but if there’s a partition with much free space, you can create it by shrinking the partition or just simply delete it if the partition is empty. Just shrink some from the partition, the Shrink Volume function allows us to input specific amount of size while Delete Volume will give us all space as unallocated, we don’t need that much to extend C
Two methods of creating unallocated space in Disk Management
Method 1: Shrink Volume:
- Right-click on a large partition
- Click Shrink Volume
- Type in the specific size when prompted or use the default
- Click Shrink
If the shrink volume function is grayed out, click on the find the solution
Method 2: Delete Volume:
- Right-click on a partition
- Select Delete Volume
- Confirm
Delete Volume will remove everything from the partition, so make sure to backup stuff before you confirm
But do you really need to delete that partition if it’s not empty?
Both methods are able to create unallocated space, the Delete partition method can activate the grayed out option Extend Volume on the target drive.
Let’s forget about “target drive” and “source drive”, make it simple, we’ll put it like this, if this is the disk map you have on the computer:
C Drive in low disk space + D Drive has free space + E Drive also has more free space
You can delete D to Extend C, but you can’t shrink D to Extend C, unallocated space from shrinking D will be at the end of D not in front of it, that’s why C Drive still grayed out its Extend Volume function
C Drive + Smaller D + unallocated space + E
TL;DR
We can’t move unallocated space in Disk Management, but we can do it in third-party partition managers, like Partition Expert, the all-in-one disk managing tool; or Partition Expert, the useful utility specially designed for partition extending, shrinking and unallocated space moving. What’s important is that moving unallocated to another partition will ensure existing data intact and no more deleting and formatting operations are required