Partition Operations
All the partition functions are listed in the page, some features are always available, some, on the other hand, requires some conditions to display, you'll know more about when reading on, or you can just type in the keywords in the search bar of the page to locate the function description.
Resize/Move Volume
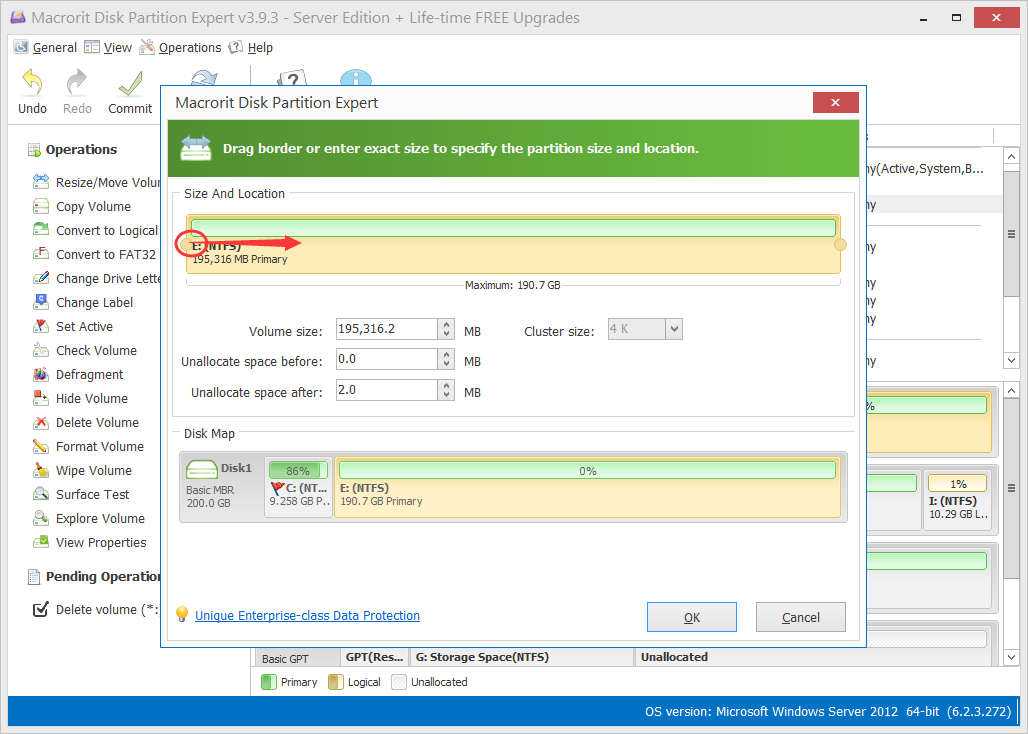
You can resize and move volume/partition in Partition Expert without data loss, steps are as followed, take resize C (enlarge C Drive) as an example, we can get some free space from E Drive, so:
- Click on E Drive first and click Resize/Move Volume
- In the resize window click and drag the header handle to the right and click OK
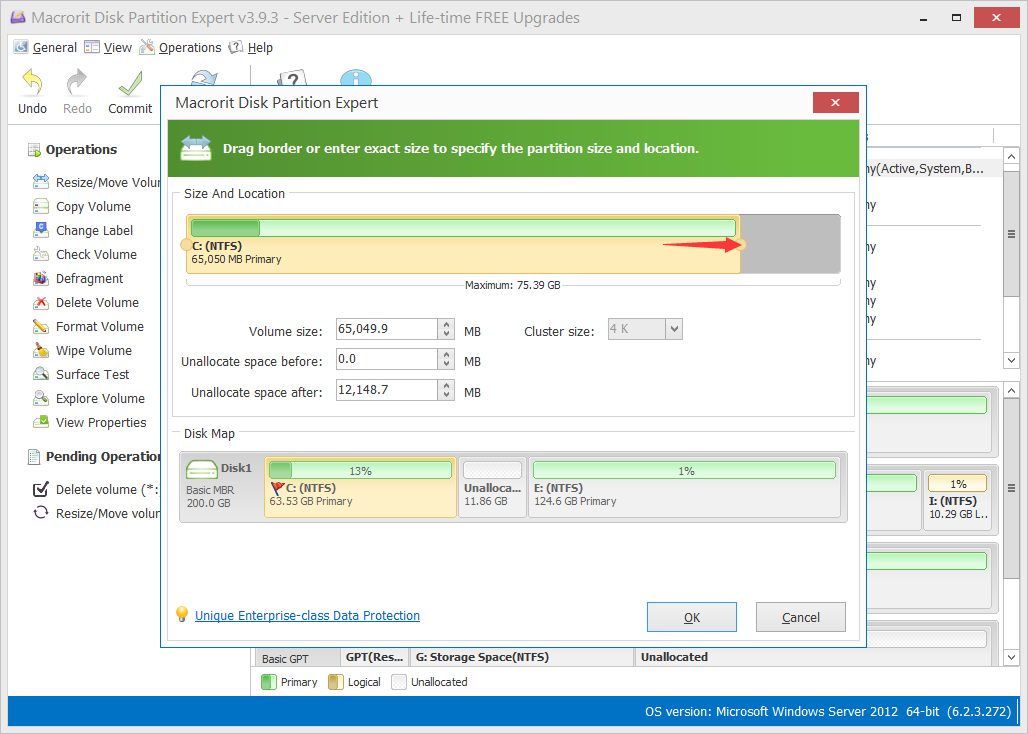
- Click on C Drive and drag the footer handle to the end to enlarge C Drive and click OK
- Click Commit in the main window and Partition Expert will do the rest
We covered how to resize partition but not how to move partition, check the tip down below to find more when you have more drives on the disk.
TIP
You may have D Drive in between C Drive and E Drive, then you can click D Drive before C, and use the same function to move the entire drive to the end of bar and unallocated space created from E Drive will be move to the top
Disk Map Simulator
Click on the buttons below to simulate your disk map and get suggestions
This Simulator is assuming that C: Drive is in low disk space
Still confused? Don't worry, just send us an email with the screenshot of the main interface of Partition Expert or the Disk Management, we'll give you the best suggestions on extending drives
Merge Volume 4.9.0+
You can merge two adjacent volumes with this function using the following steps:
- Right-Click on a partition
- Select Merge Volume from the menu
- Check two volumes to merge
- Select the target volume in the "Merge selected volume to:" area
- Click OK and Commit
Copy Volume
Backup partition using this Copy Volume function will be easier than manually copy and paste files from one drive to another
TIP
Before Copying, please make sure there's unallocated space on the disk, the same disk or other disks (external disks or inner ones)
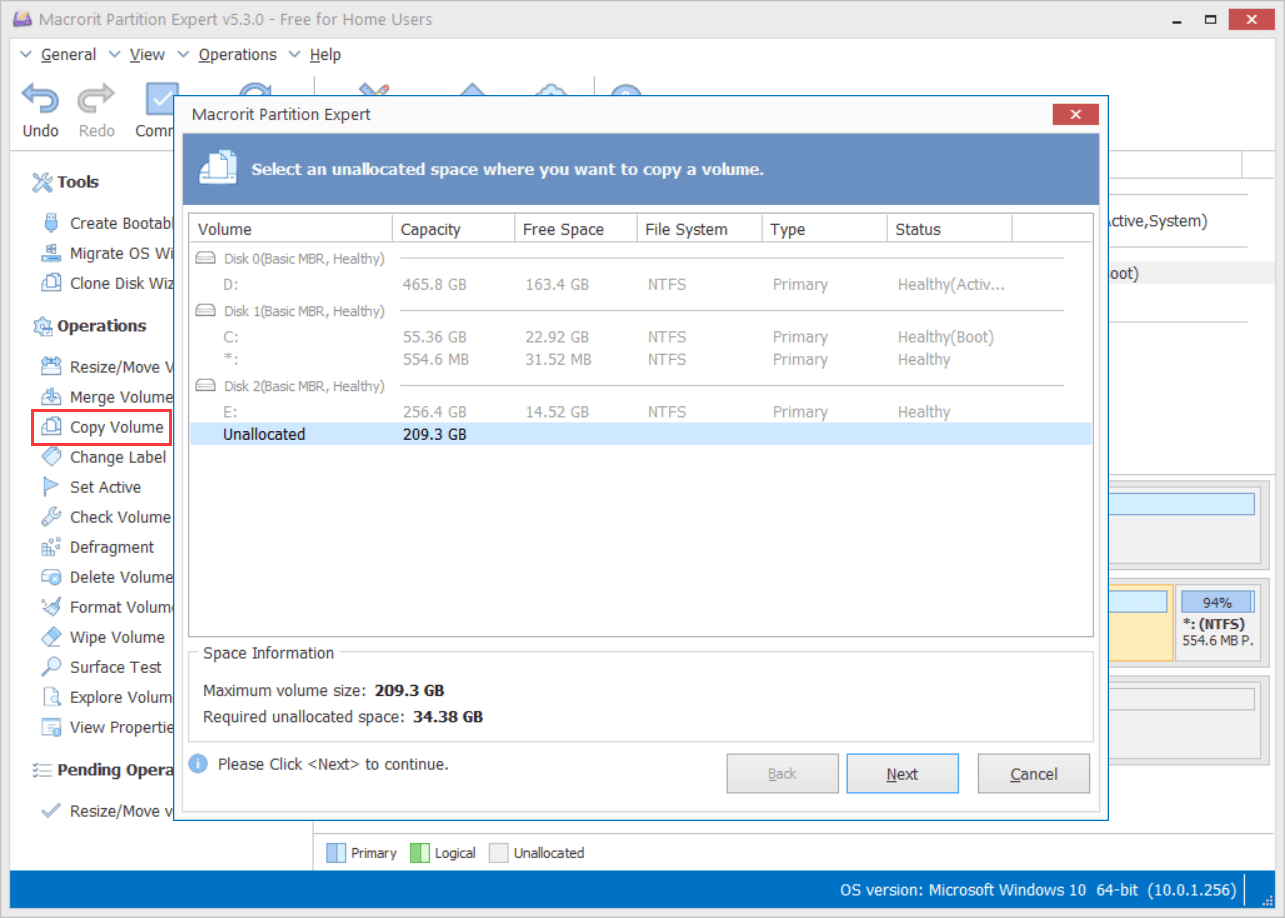
- Click on a partition and choose Copy Volume from the sidebar
- Click on the unallocated space (if it's available) and click NEXT
- Define how much free space do you want to leave on the source partition by dragging the handle to the left(decrease) or the right(increase) ↔ , then assign a drive letter and define volume type (Primary or Logical) or just click NEXT to use the default settings
- Click Finish and Commit
TIP
If there's no unallocated space on the disk, you can click on a large partition and shrink it with the function Resize/Move Volume
Convert to Logical
Available when clicking on a non-system primary partition
Convert Primary partition to logical partition without data loss
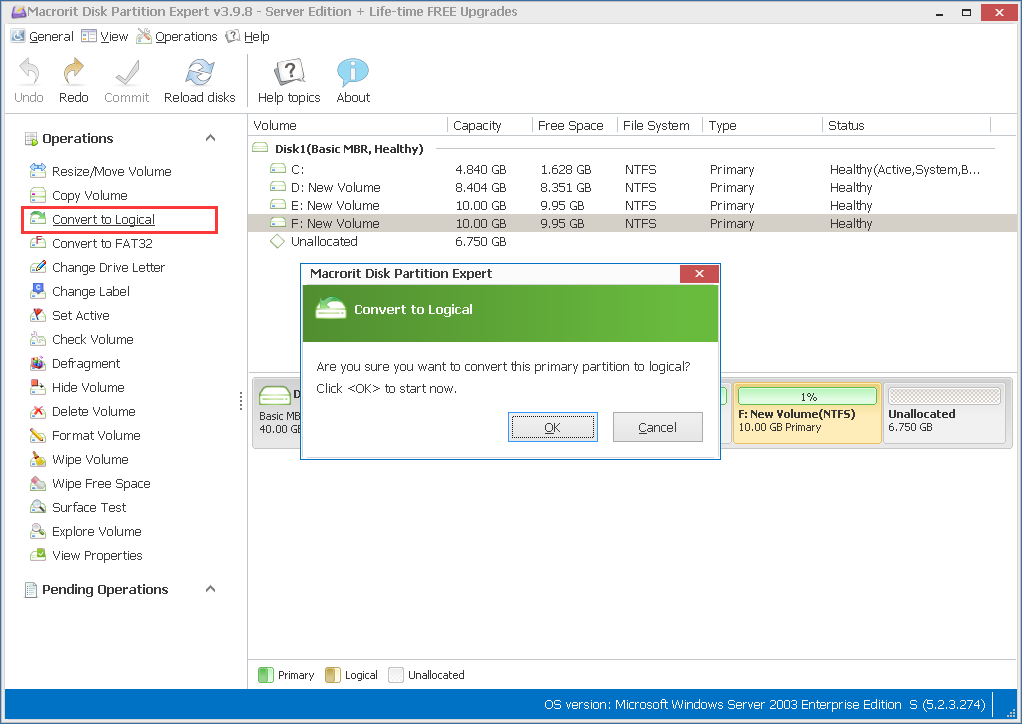
- Click on a primary partition and click Convert to Logical
- Click OK and Commit
When there're 4 primary partitions on the MBR disk, we can't create the fifth partition even we have unallocated space, at this time, we can convert one primary partition to logical without deleting or formatting this volume, data on this drive will stay intact and safe
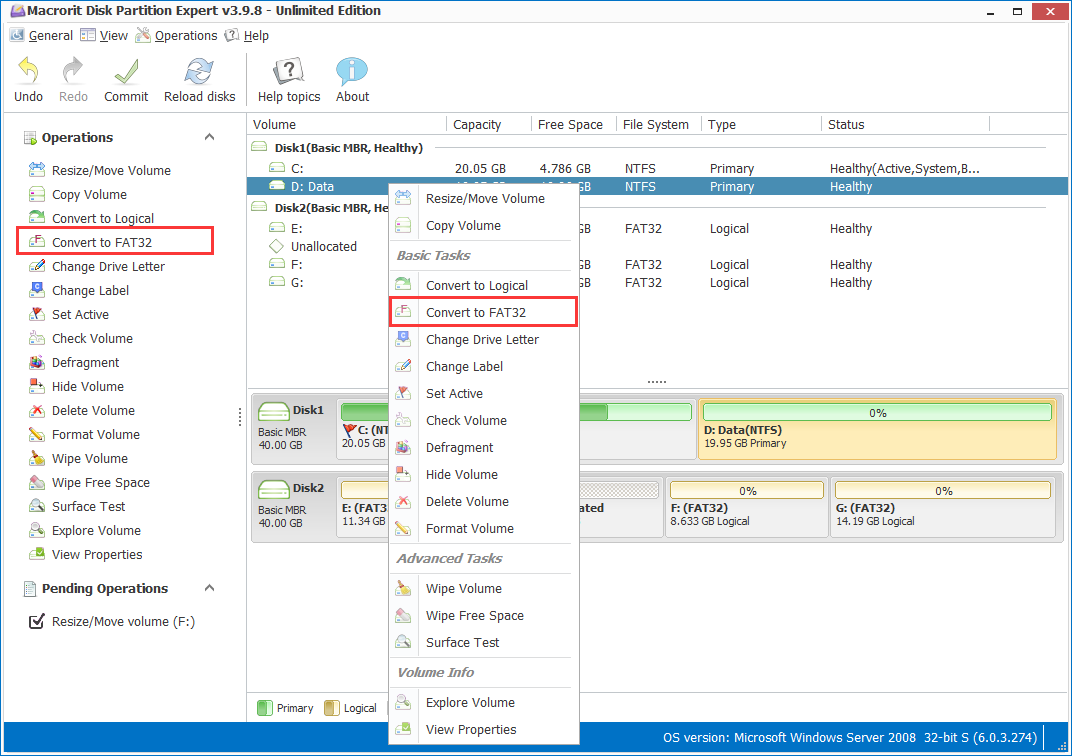
Convert NTFS to FAT32
The FAT32 file system is widely used in game consoles like Xbox, PS3, PS4, other hard drives may require this file system to work probably too. We can, of course, format a partition to FAT32 in Windows Disk Management, File Explorer and diskpart command prompt, but in Partition Expert, we can convert NTFS to FAT32 without data loss by doing so:
- Click on an NTFS partition and choose Convert to FAT32
- Click OK when the prompt message asks
- Then click Commit in the main window
Partition Surface Test
Use this function to check bad sectors on the storage devices like:
- Hard Disk Drive (HDD)
- Solid State Disk (SSD)
- Flash drive
- External hard drives
- Other storage media
You can either scan the entire disk or just part of it by specifying the scan area and you can set this tool to Automatic shutdown after scan
Steps to surface test:
- Click on a partition and select Surface Test from the sidebar
- Click Scan area if you want to scan part of the disk
- Click Scan now to scan the disk for bad sectors
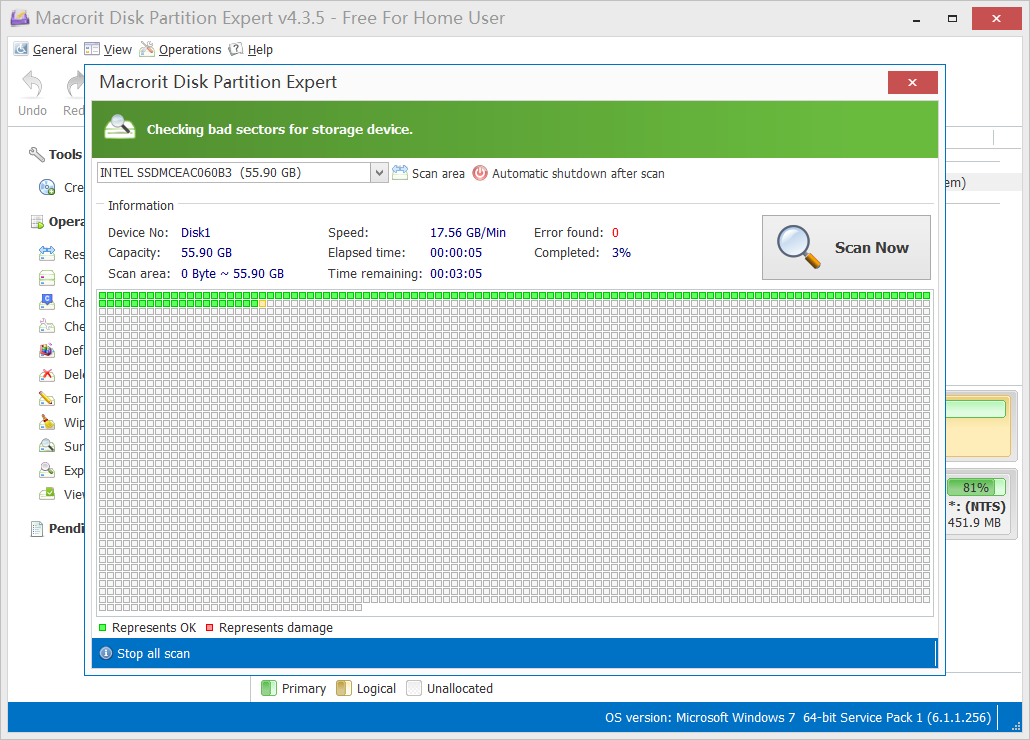
TIP
Good sectors are shown as red while bad sectors are in red dots
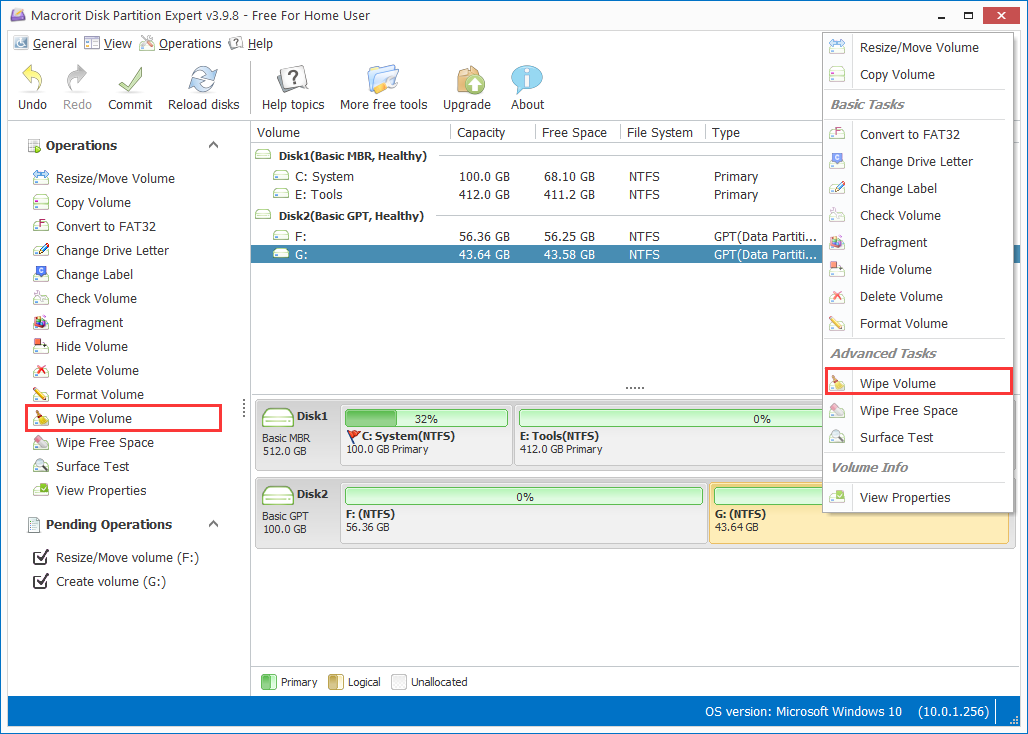
Wipe Partition/Volume
Wipe the entire partition or volume and make data un-recoverable, used when you want to clean install the operating system, or when you want to completely erase everything on the volume.
Steps of wiping a volume:
- Click on the volume you'd like to wipe
- Click Wipe Volume and specify a wiping method from the list
- Click OK and Commit, then Partition Expert will start to wipe the volume
Wiping methods in Partition Expert:
- Fill sectors with zero (Quick) (default)
- Fill sectors with one (Quick)
- Fill sectors with zero&one (Quick)
- DoD 5220.22-M (3 passes) (Slow)
- DoD 5220.22-STD (7 passes) (very Slow)
If you don't know which method to choose, the default method is good enough, one pass overwriting method will be just fine to make data on the volume clean, we provide DoD wiping methods just in case some companies would require these kinds of standards
After wiping, this partition will become a not formatted volume, which can be used for creating a new partition after formatted
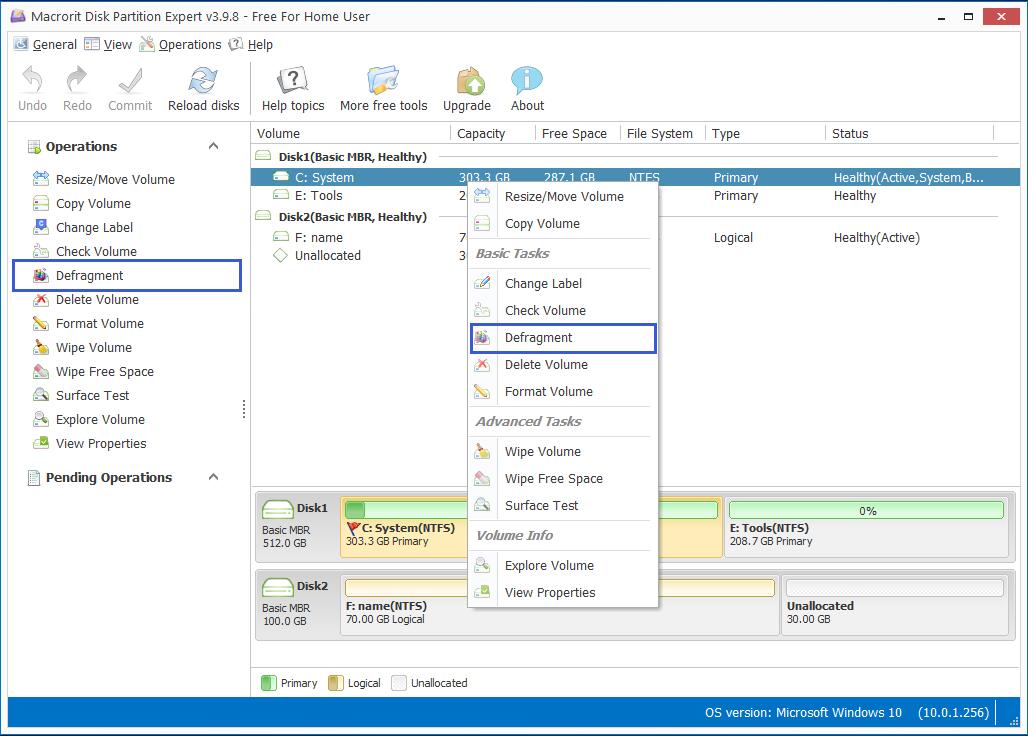
Defrag Partition/Volume
Defragment, used to optimize the volume you clicked.
- Click on a volume and click Defragment
- Click OK to directly defrag, no need to click Commit
When you move large file to this drive, you can use this function to defragment if it response slow on you click or other operations, useful in Windows XP and Windows Vista, not very obvious in Windows 7 and Windows 10, not because the function is useless in such systems, but needless in new systems, OSes after Windows 7 are built-in better optimized than the previous versions
Create Partition
When clicking on unallocated space, this option is available
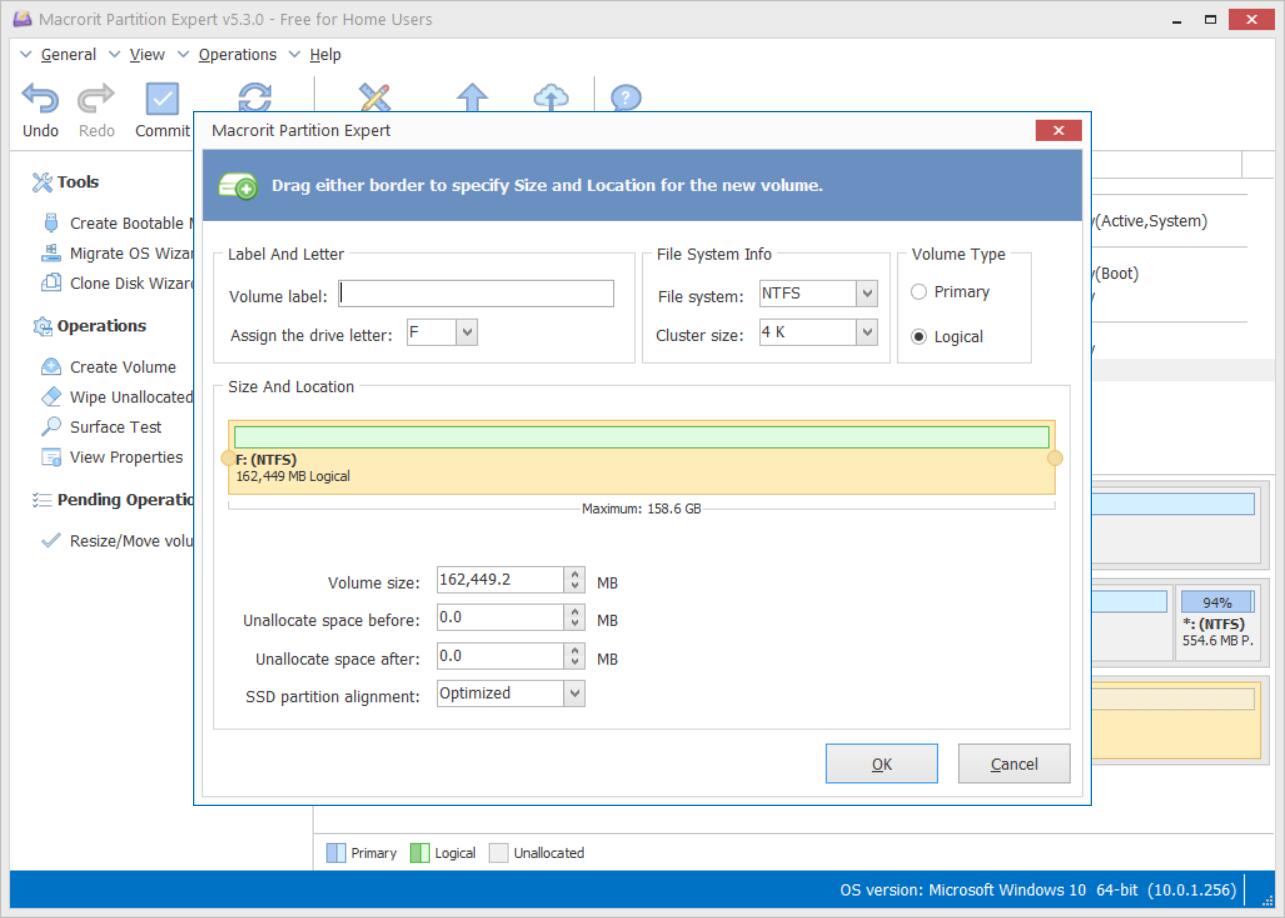
Steps of creating a new partition
- Click on unallocated space and click Create Volume
- In the creation window, specify the label, drive letter, file system, volume type, and volume size
- Select the "Optimized" option for SSD drives
- Click OK and Commit
File system supported:
- NTFS
- FAT16
- FAT32
Volume Type:
- Primary
- Logical
TIP
We can only create 4 primary partitions at most on MBR disk
If you're about to create more than 4 partitions, make sure the last partition you create is selected to logical, in fact, Partition Expert will do that automatically, we describe it here just in case you wonder
Format Partition
Format volume is to re-define file system, cluster size and drive label, the format operation is not permanently deleting data, wipe volume does.
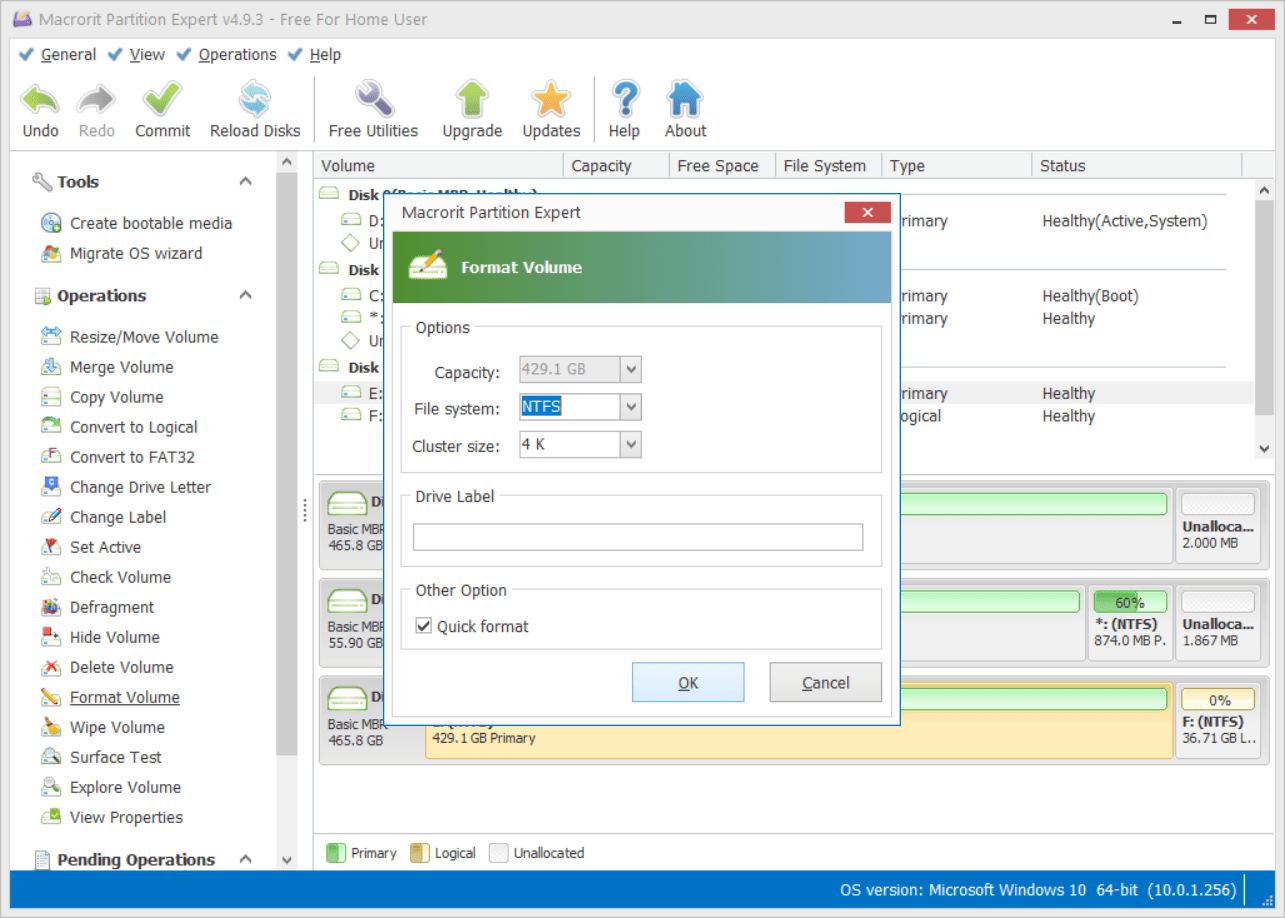
Steps to format a partition:
- Click on the target partition and choose Format Volume
- In the format window, choose the File System, select cluster size and give a new label
- Leave the 'Quick format' option as checked and click OK, Commit
File system can be format to:
- NTFS
- FAT32
Cluster size:
- 512 Byte
- 1 K
- 2 K
- 4 K
- 8 K
- 16 K
- 32 K
- 64 K
What happens if I uncheck the 'Quick format' option?
Then the format function will perform a low-level format, which is format a volume sector by sector, very slow, one-pass overwriting to the sector, like what we did in the 'Wipe Volume' function.
If it's to use the volume again, a quick format will be the best option unless you'd like to remove everything beyond recovery on this partition
Set Partition Active
Available when clicking on a primary partition with no active volumes on the disk
One disk can only have one active partition, system volume needs to be active partition, so this option is always for C Drive activating, or other system volumes on other disks (if you'd like to dual boot the system)
- Click on a primary partition and click Set Active
- Click OK and Commit
Hide/unhide Partition
Hide partition, the function is always available when you click on a partition with a drive letter or without a drive letter (like the system reserved partition), hidden partition won't be listed in the Windows File Explorer window but will be listed in Partition Expert so as for you to unhide it again
Unhide partition, this option is only available when you clicked on a hidden partition
Steps of hiding/unhiding a partition is easy, just click on the partition, choose the option and click OK, Commit
TIP
If you have uninstalled Partition Expert after hiding a partition, you can use Partition Expert Portable Edition to unhide it
Change Label
Always available option
Click on a drive and click 'Change label' to re-label it, useful when you want to category partitions
Change Drive Letter
Available when clicking on a non-system drive
- Click on a drive (not C Drive or system drive)
- Click Change Drive Letter option
- Choose a new drive letter from the table
Can be used for changing the drive letter in VMware too if you want to add D Drive to the disk map (In VMware, D Drive is defaulted to the CD Driver, change CD/DVD Driver to Z drive and drive letter 'D' is available)
Explore Partition
Available option when you click on a partition
Works like Windows File Explorer but more convenient, the tree view list items are easier to access and find files
You can see the followings in the Explore volume function:
- Local Disk Name
- File and Folder Name
- File Size
- Item type
- Date modified
View Partition Properties
Available option when you click on a partition or unallocated space
Properties include the following can be checked:
- NT object name
- Volume GUID
- Status
- File system
- Sector size
- Cluster size
- Partition type
- Partition number
- Physical sector No.
- Hidden sector
- Total sector
- Geometry
Check Partition
Always available option when you click on a partition
This function can
- Fix found errors
- Fix logical bad sectors (try to)
TIP
If you'd like to scan or detect the physically damaged bad sectors, in Partition Expert you can try partition surface test or just try another program Disk Scanner